Click on images to see them in full screen
F23B2091AA8C3A5D80258A4A0045DD33Language switching
From Door Tablet V7.3, you can set interactive displays to switch languages using touch. The feature is available in single meeting spaces and cluster displays. Language switching offers the following:
- Easy set-up that requires little effort
- 13 built-in languages for switching, or add your own if needed
- Door Tablet flags, when using the built-in languages
- Create your own graphics for flags
- Decide where on the display you wish to show the language switch
- Automatically revert the display back to the original language after a number of seconds, or keep it manual
- Full support for semitic languages such as Arabic and Hebrew with RTL (right to left) text
- Refine styling when language is switched
VIDEO: Setting up key business rules
Why use language switching
For organisations that span countries it is often difficult to choose the local language knowing that visitors will not understand it. As a result, systems have been set to English instead of the local language, when English usage is infrequent. By setting to the local language and offering an easy language switch using touch, your displays are well understood to regular users and visitors both internal or external.
Set-up
To offer language switching you need to create translation sets, preferably named after the languages you wish to use. The translation set for each language may be empty but can also contain any adaptations you wish to implement. Note: you can create a complete translation for a language we do not currently offer as part of the built-in collection. Once your sets have been created you add reference to these in either the System Profile (which will apply to all displays), or at a meeting space/resource level.
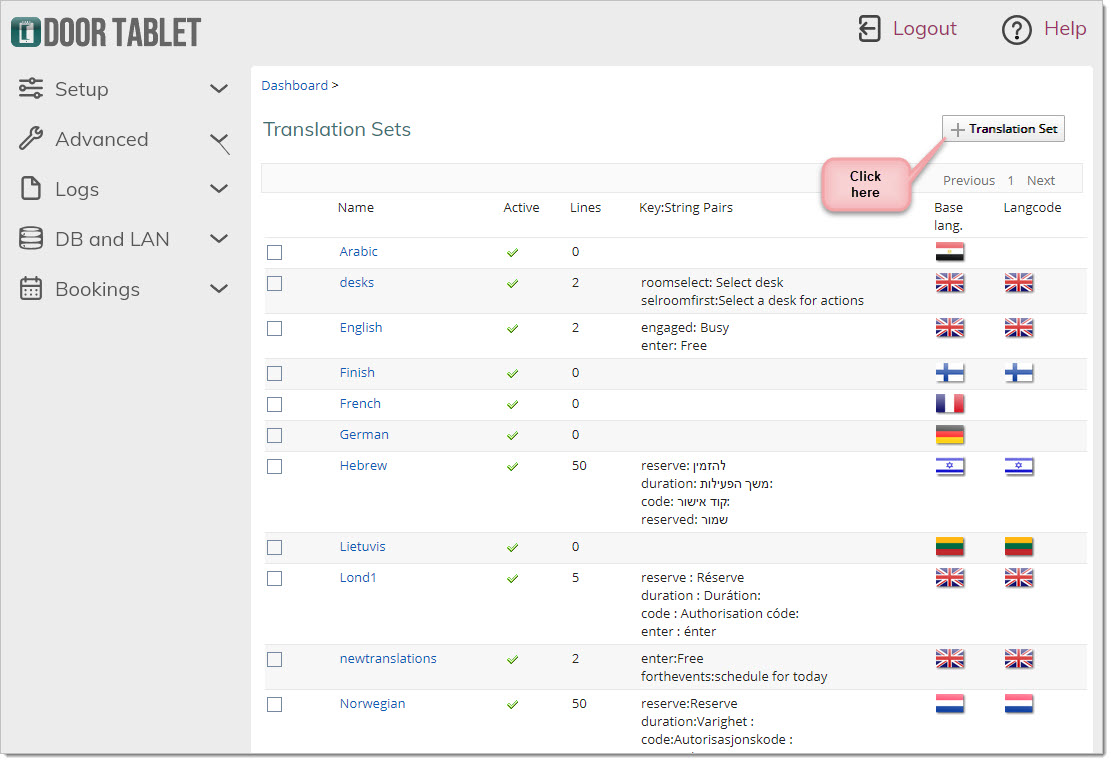
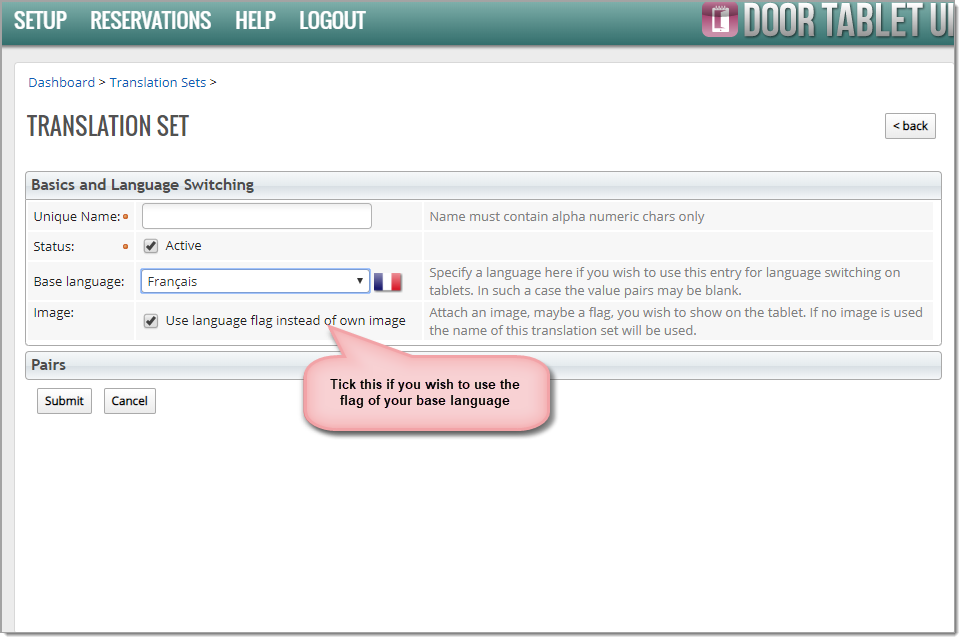
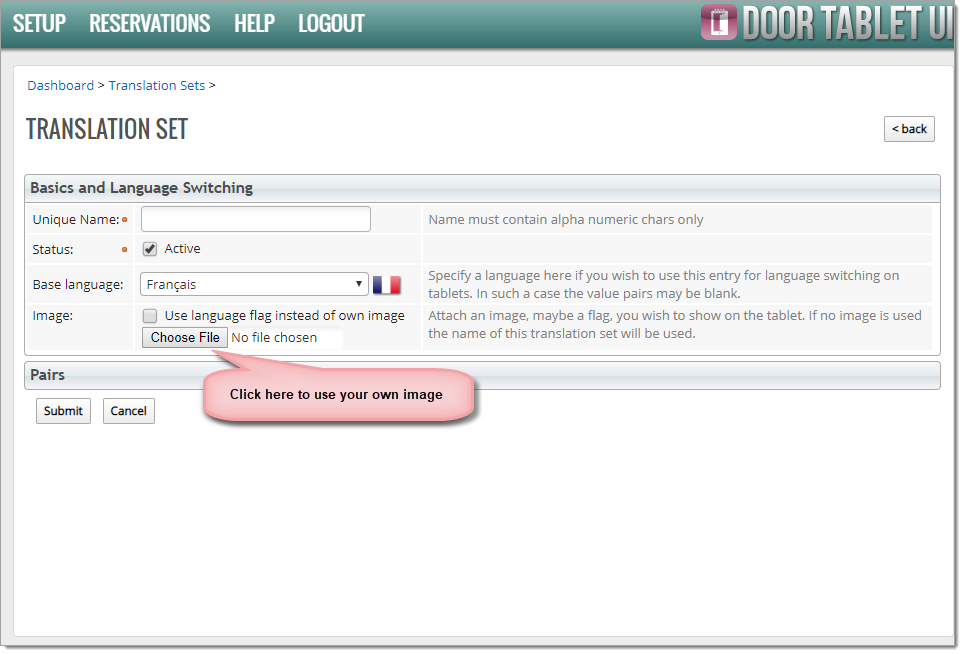
Creating Translation Sets
Open the "Translation Sets" view and click on "+ Translation Set"
Alternatively you can upload your own graphics:
Use our standard flags and add your own
The following files can be used by you to create your own flags. Using one of the files below makes it easy to mix our own flags with yours.
 en.png
  de.png
  it.png
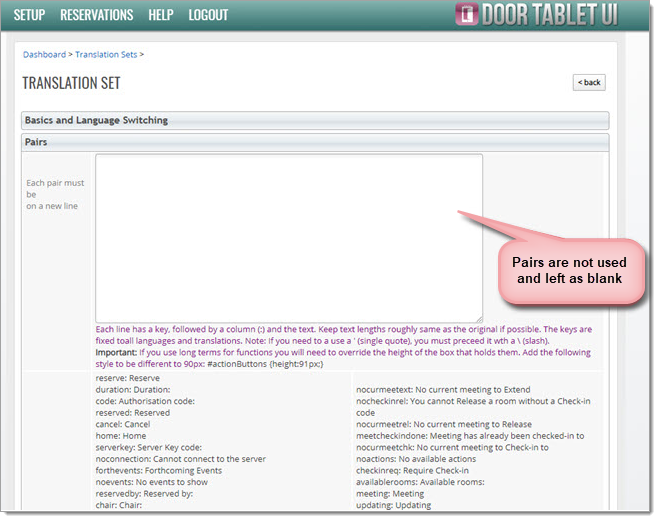
Translation Pairs
Clicking on 'Pairs' shows where you can type Translation Pairs. These are used to change individual words and phrases on the display. Type the word that is the default for the display followed by a colon, and then type the word you would like to be on the display instead. Note: the default words are shown below the text box.
Translation Pairs may be left blank:
Using the new Translations Sets
Once your sets are ready, you can specify these in:
- The System Profile
- Meeting Space/Resource record
Note: if you set switching data in the system profile, the setting will be used by all single meeting spaces or cluster displays (if the switching data for the individual displays are left blank). This allows you to set a universal switch, say to English, for every meeting space without specifying an additional language to switch to.
If you specify just one language to switch to, users will not be able to manually switch to the original language but the automated revert will switch the language back.
Auto Switch back
For Door Tablet to revert back after a duration you specify, you must select a Translation set in the first field below.
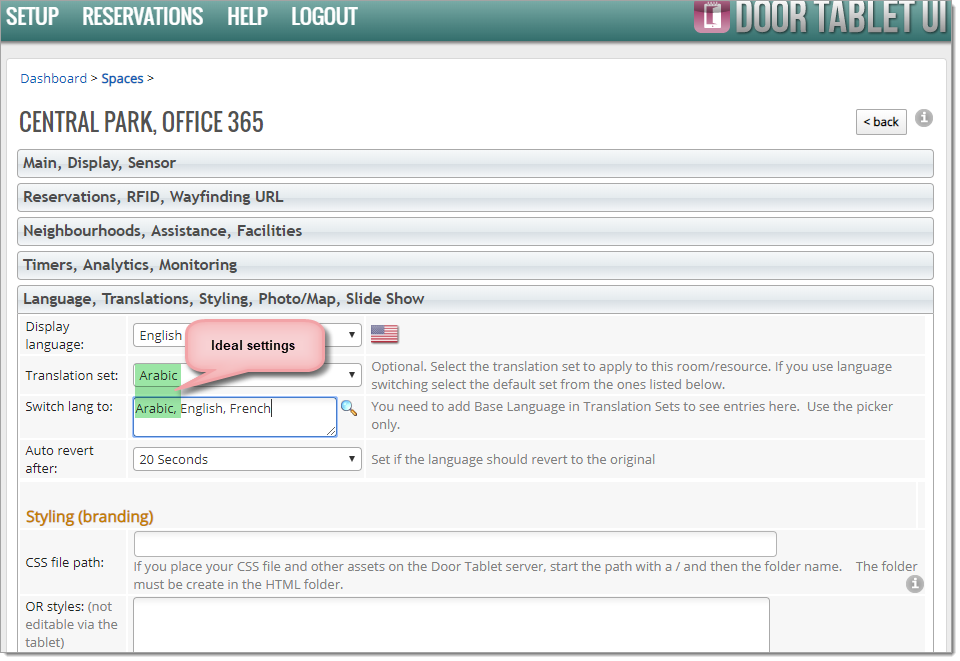
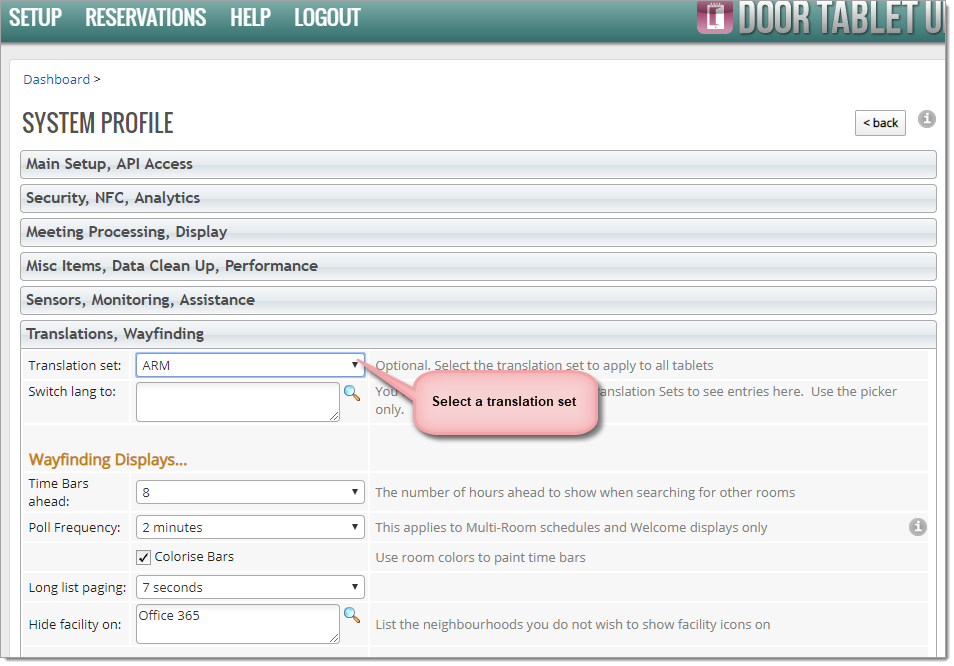 Ideal Set-up for Switching
For best results, set the Translation set to one of the languages you list in the "Switch lang to". When you use such set-up, the flags or text are properly highlighted and dimmed at all times.
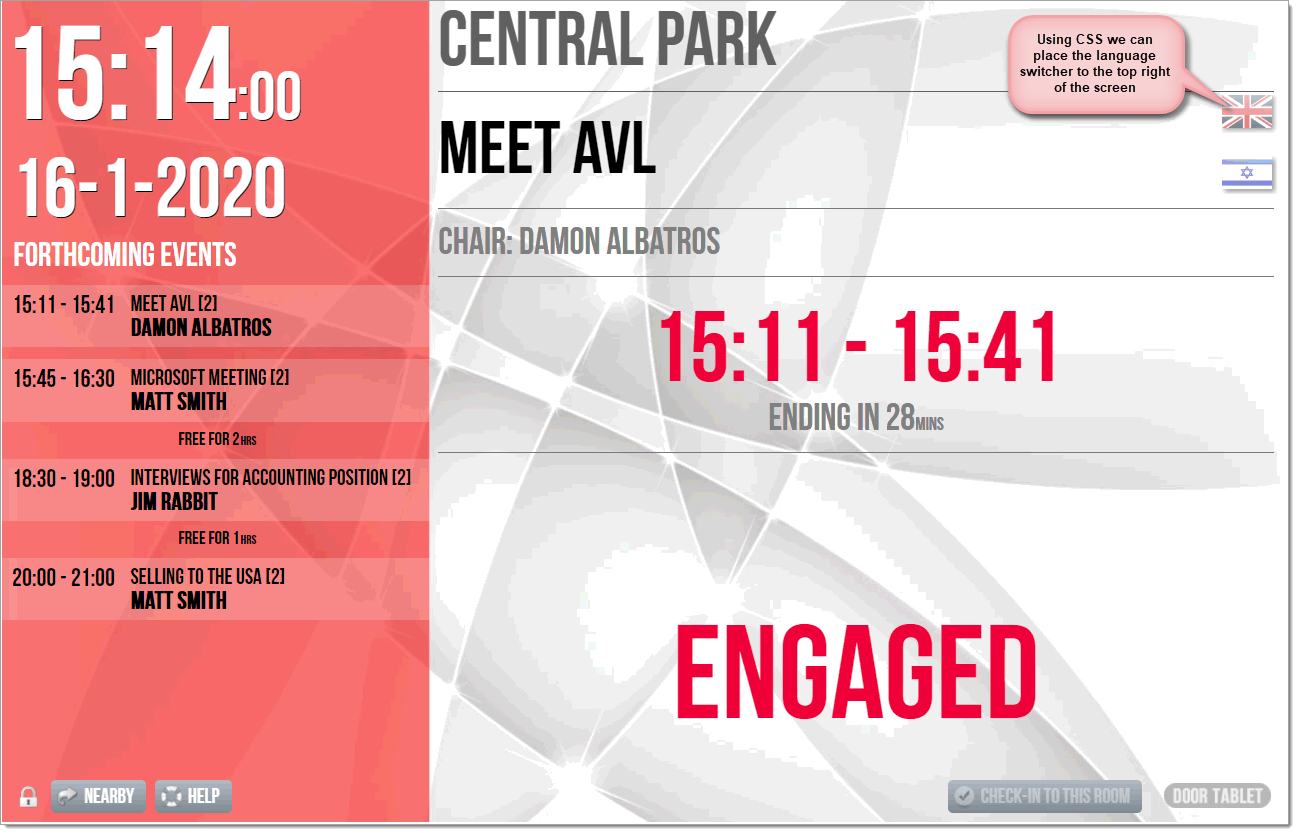
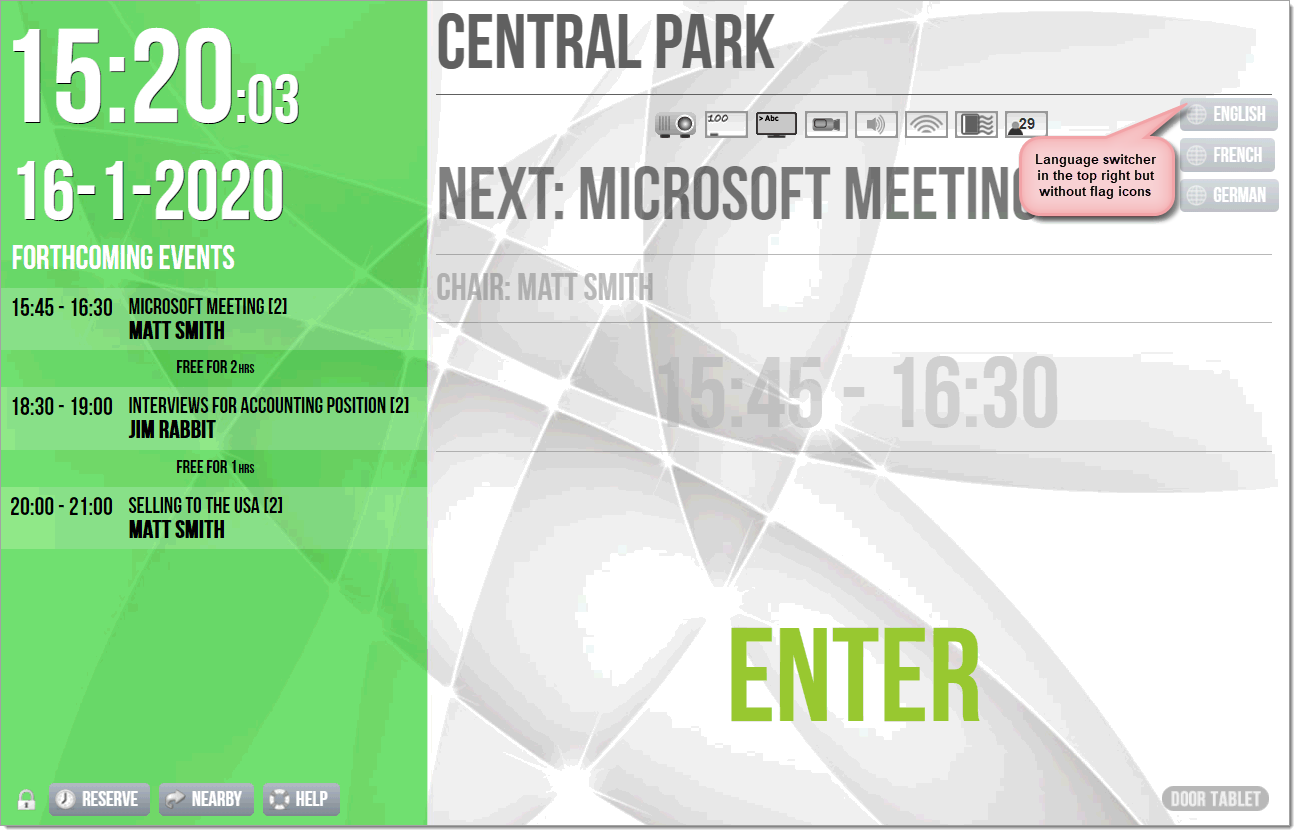
 Controlling Switcher placement on your displays
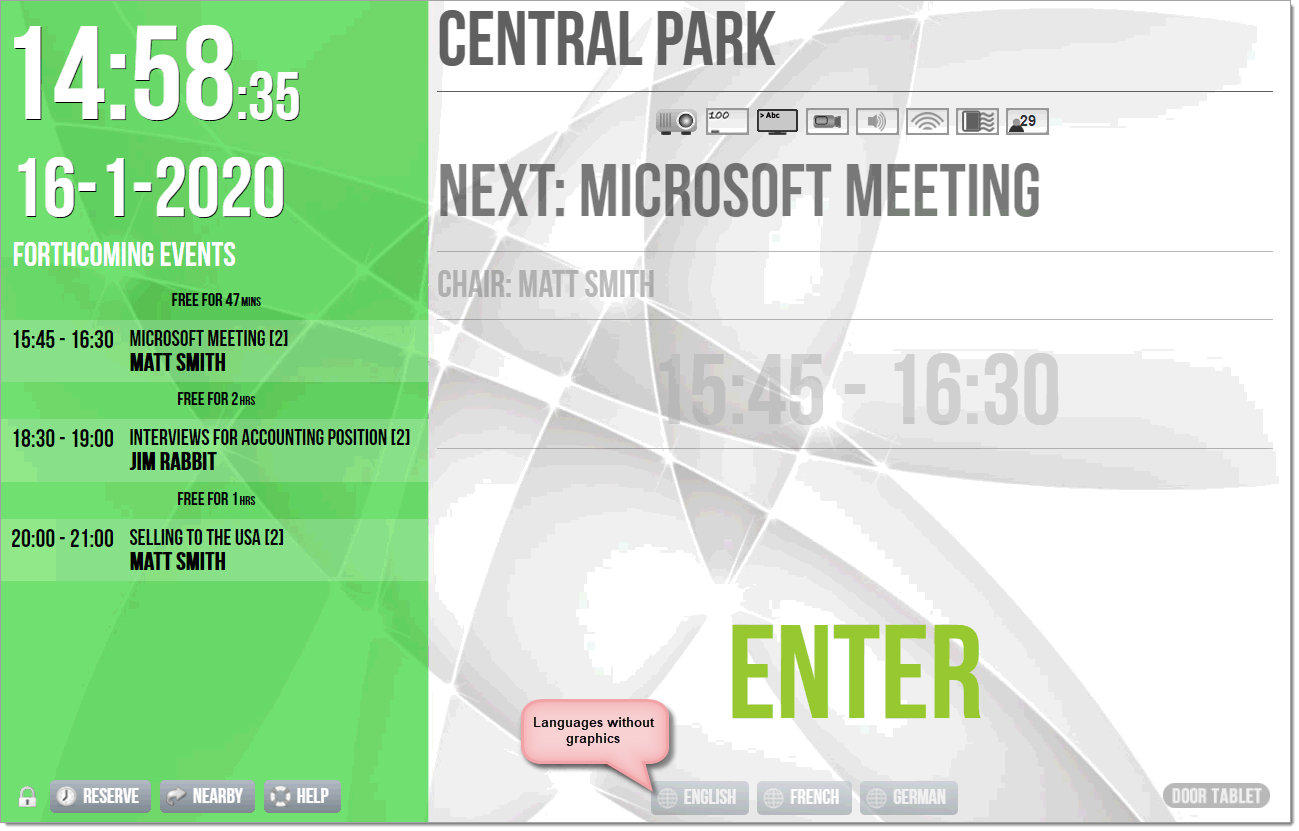
By default, we place the language switcher at the bottom of the display, horizontally. You may like to display the switcher below the meeting space title or even on the side, vertically. You make these changes using CSS. You may also decide to reverse the way we dim and highlight languages, again in CSS. See more below.
Positioning of the Switcher
You decide where your language switcher is on the screen. Here are a couple of CSS definitions:
Place the switcher in line with the buttons at the bottom of the display.
.langSwitcher {
position:absolute;
width:360px;
height:46px;
bottom:0;
left:40%;
}
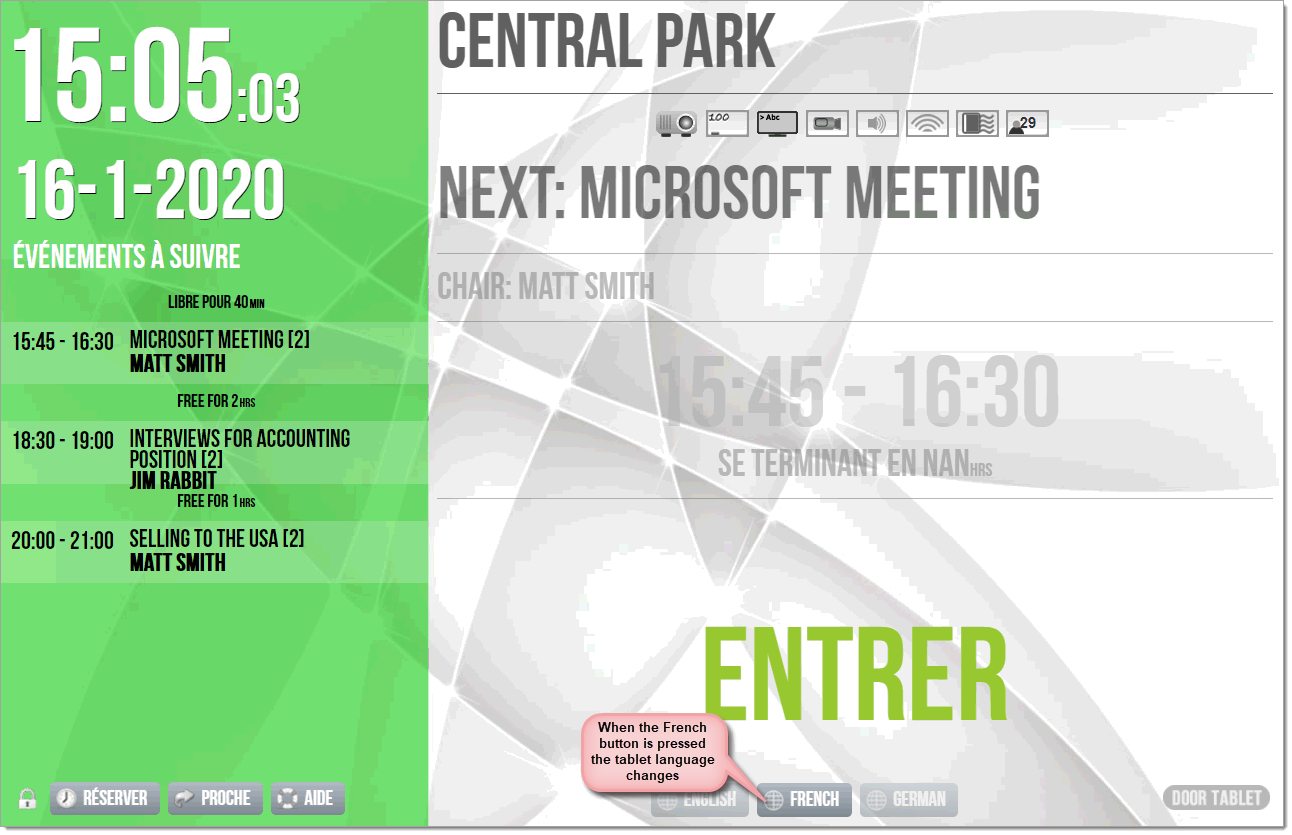
And when French was pressed:
And using our flags, then selecting French:
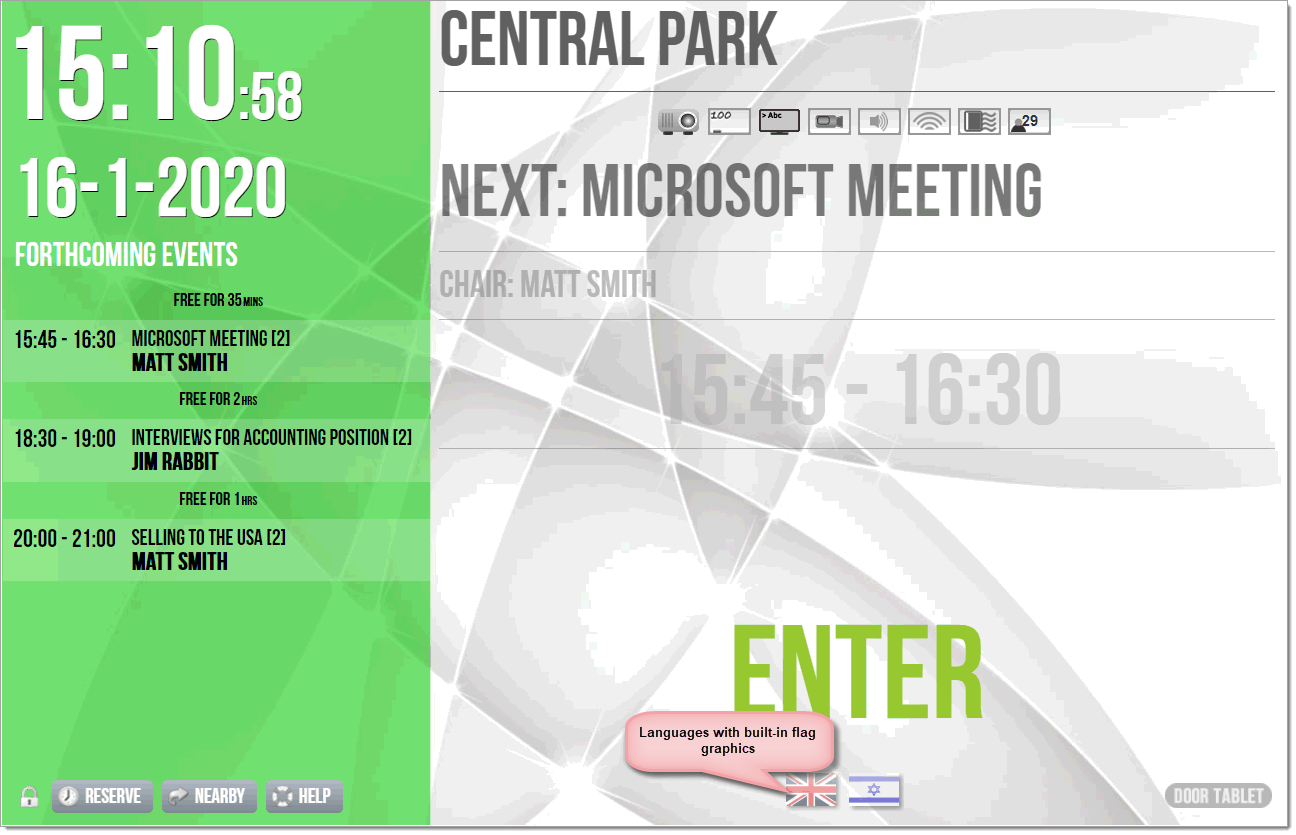
Placing the switcher on the top right of the display is easy, too. Add the following CSS to the meeting space (for language switching using flags):
.langSwitcher {
position:absolute;
width:70px;
height:200px;
top:100px;
right:0px;
left:auto;
}
.switchLink {
margin-bottom: 15px;
}
 Note:
Note: you must "cancel" the built-in default positioning, for example, when we want the "left:40%;" to be ignored, use "left:auto;".
In order to display the switcher in the top right using labels, which are wider, use the following CSS:
.langSwitcher {
position:absolute;
width:110px;
height:200px;
top:100px;
right:0px;
left:auto;
}
.switchLink {
margin-bottom: 5px;
}
 Opacity
Door Tablet displays the current language with Opacity 1 and other available languages with Opacity 0.5. If you like, you may reverse this arrangement using CSS. The default set-up is .switchLink { opacity: 0.5; } and .curentLang { opacity: 1; }
Reverse it like so:
.switchLink { opacity: 1; }
.curentLang { opacity: 0.5; }
Not seeing all languages
Don't panic - the reason is likely simple: the size of the language switcher is too small to accommodate your languages. Increase the size using CSS, of the class "langSwitcher", either the width or the height.
Refine styles
When switching languages you may wish to change the styling, for example use a different font. Follow this link to find how
