Click on images to see them in full screen
023CE9CF556324BD80258924005855C9Overlay Images
From version 10.7 you can display an image over a meeting display, for each meeting. The function is available on all platforms but special features are available for Microsoft 365 users - see below.
This feature allows you to display a different image for each meeting. The image gets attached to a meeting, and will show for the duration of that meeting, only.
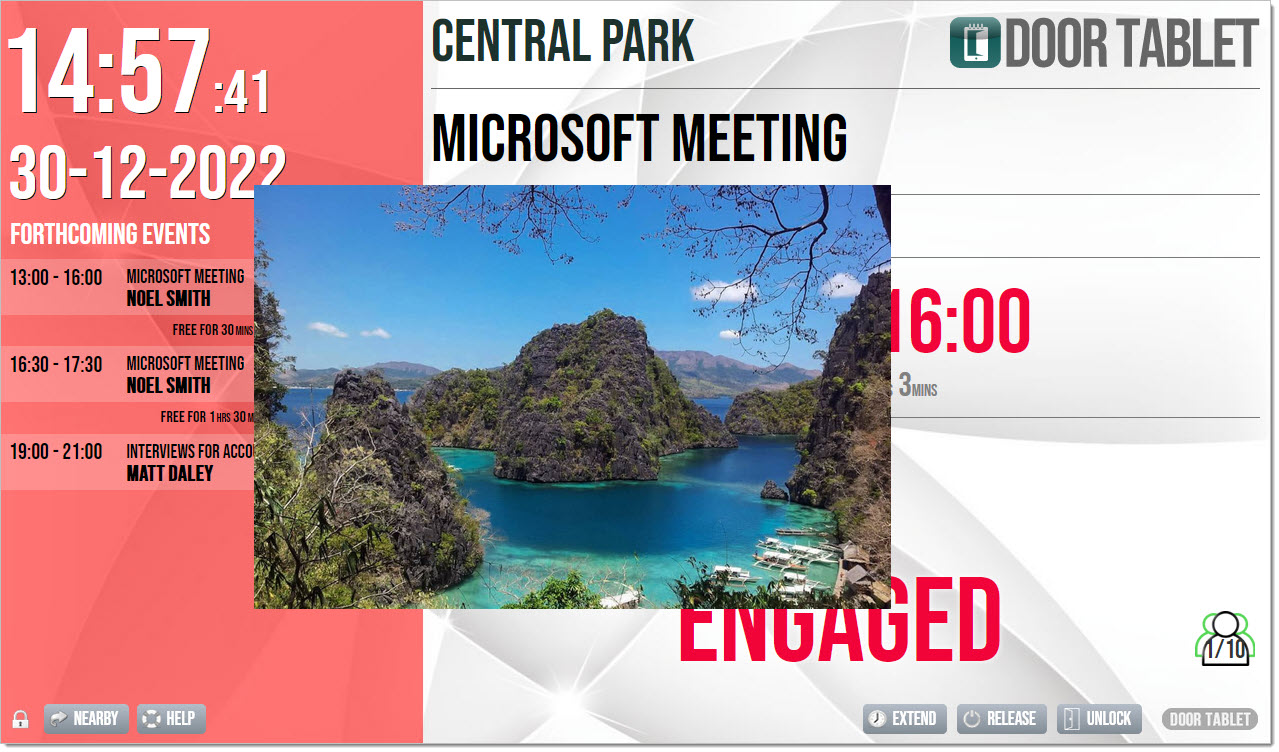
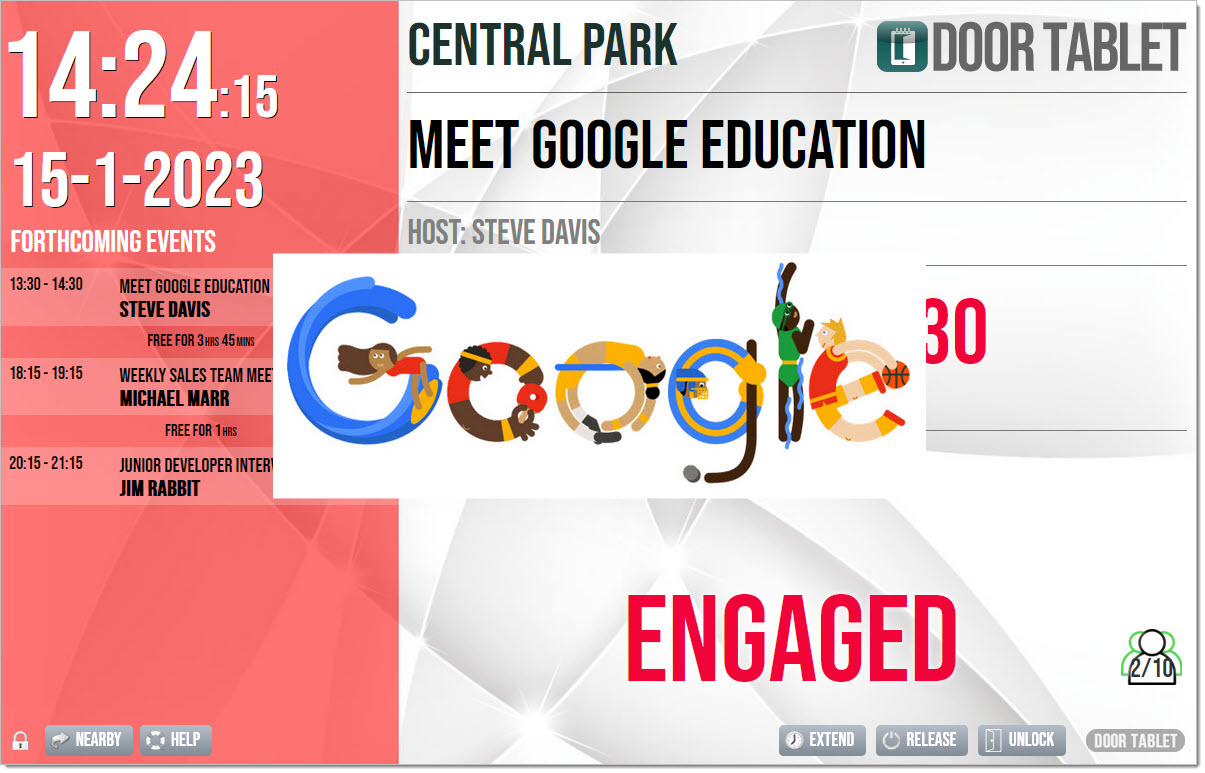
For example, after a few seconds of inactivity:
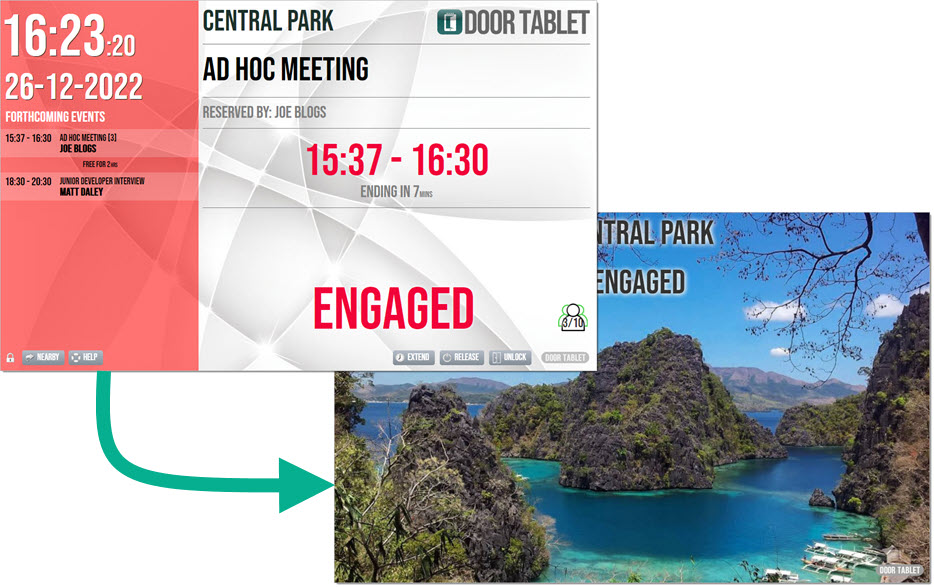
When you touch the overlay image...
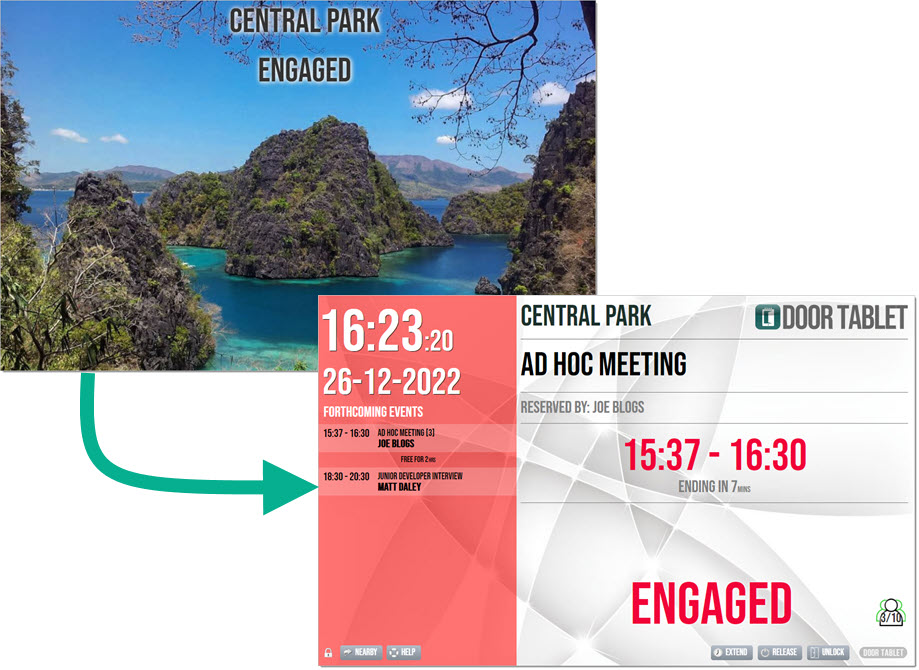
An image may occupy the entire width of the display and when the screen is touched the image disappears. Since the image is presented over the normal display, if you use an image that is transparent in areas, what is behind the image will show.
You can override the following:
- The image width
- Image position
- Hide the room name and meeting status when the image is displayed
The above overrides are done using CSS. Whenever you change these you must restart the display so that your changes apply.
An image may be added after the meeting has begun and the overlay image will still show up.
Adding an image to a meeting:
Find the meeting in the list of bookings...
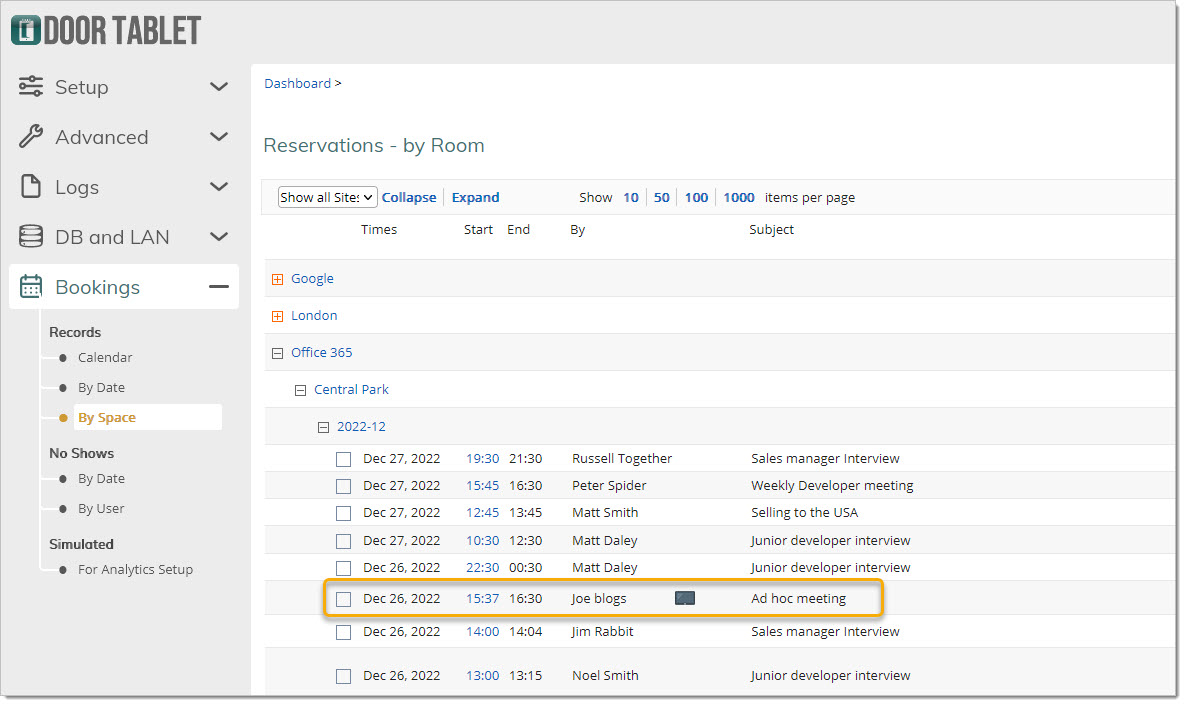 Click on the start time to edit the record and add an image.
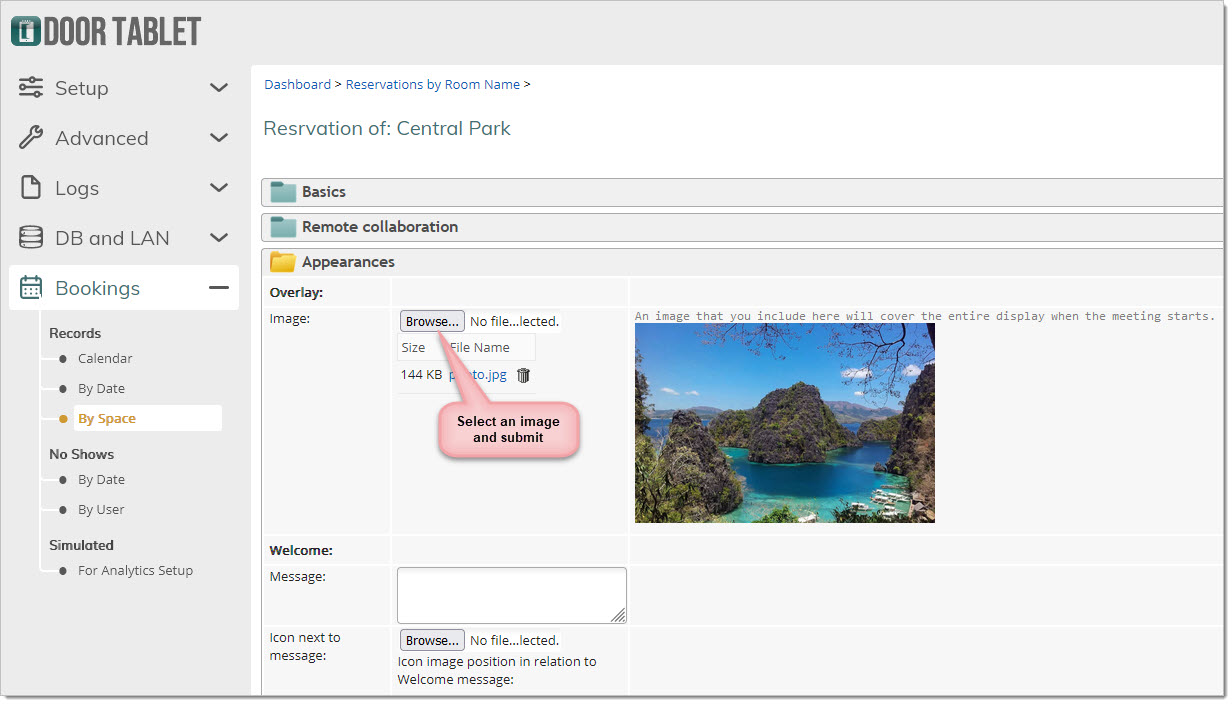
Go to 'Appearances':
Click on the start time to edit the record and add an image.
Go to 'Appearances':
 Hiding the room name and status when the overlay image is showing
Add the following CSS to your branding:
Hiding the room name and status when the overlay image is showing
Add the following CSS to your branding:
.displayTitle, .displayStatus {

	top: -300px;

}
Note: you cannot use display:none;

Changing the size or position of the image
You may position the image anywhere on the screen. Your branding CSS comes handy when doing so:
.roomImageApply {

	width:50%;

	top: 25%;

	left:20%;

}
Will be displayed like so:
If you touch anywhere on the screen, including areas where the image does not cover, the image will disappear. The image will reappear after 10 seconds of inactivity.
Features for Microsoft 365 users
When using 365 you may add an image to your booking and this will show on the display, as shown above. The advantage of this is that you can add images, or even change images, right in your 365 calendar without the need to open the Door Tablet Admin interface.
Before you begin, you need to configure MS365 to save attachments from the user personal calendar to the room calendar, like so.
When using the Door Tablet image overlay feature, issue the following command:
Set-CalendarProcessing -Identity <name> -DeleteAttachments 0
For example:
Set-CalendarProcessing -Identity 42ndstreet -DeleteAttachments 0
For more details on how to connect to Microsoft 365 and issue commands, see here: 
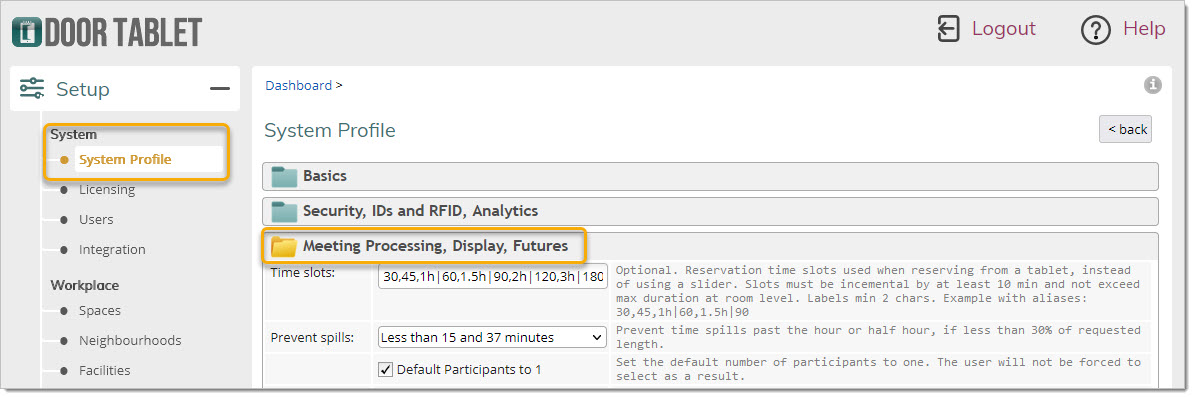
The feature requires configuration in the system profile, as shown here:
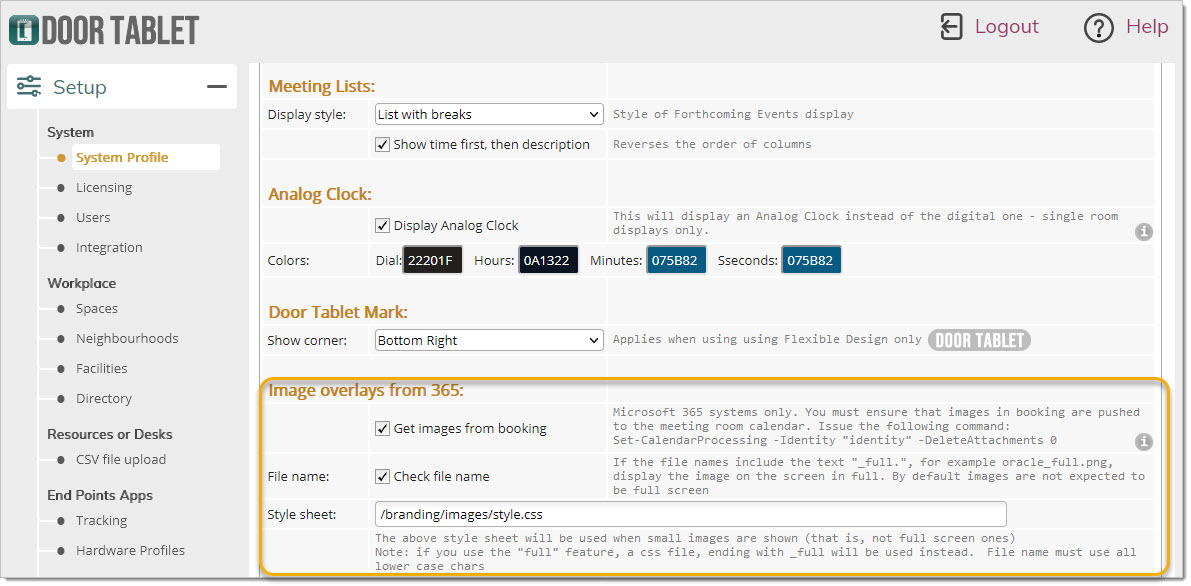
Styles
Please note that the style sheet you can use here will apply only when the image is shown, and will be removed when the image is removed. The style sheet can be used to position items and even hide other items.
When you use the "full" feature, you can control if the room name and status shown over it, and where. To use this alternative CSS file use a named file ending with _full. For example, if the file name you used above is style.css, the file name for full images will be style_full.css. To see an example if this file see at the very bottom of this page.
Adding images to your bookings, in Microsoft 365
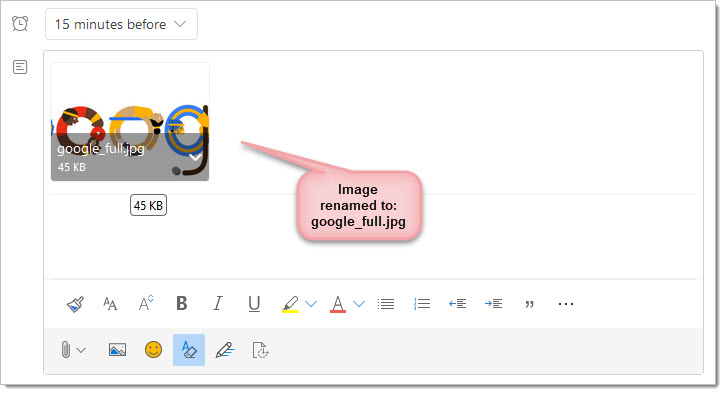
The Outlook application allows you to add images as either in-line or as an attachment to the booking. Door Tablet will use the first image you attach, if multiple ones have been loaded. Please remember to configure 365 to not delete attachments from bookings when these are pushed to the meeting room calendar.
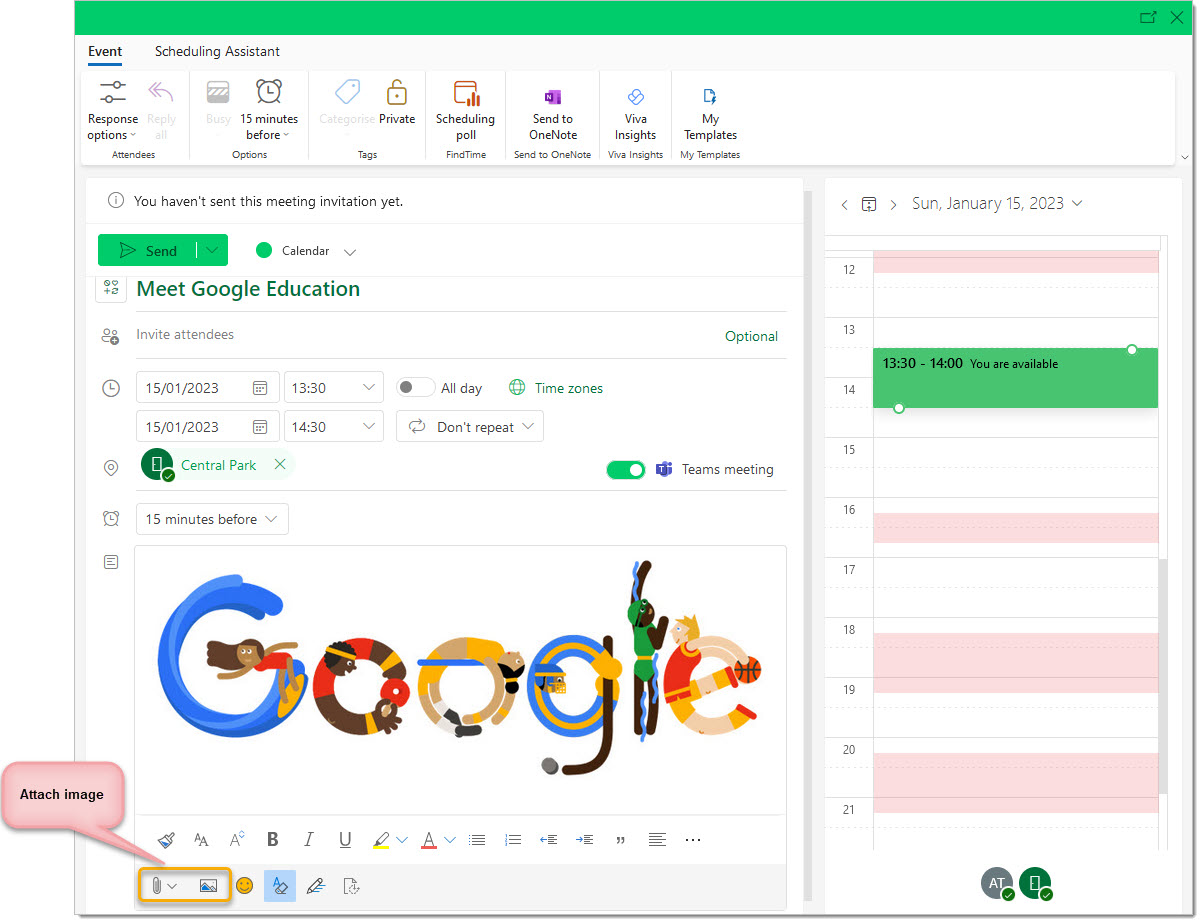
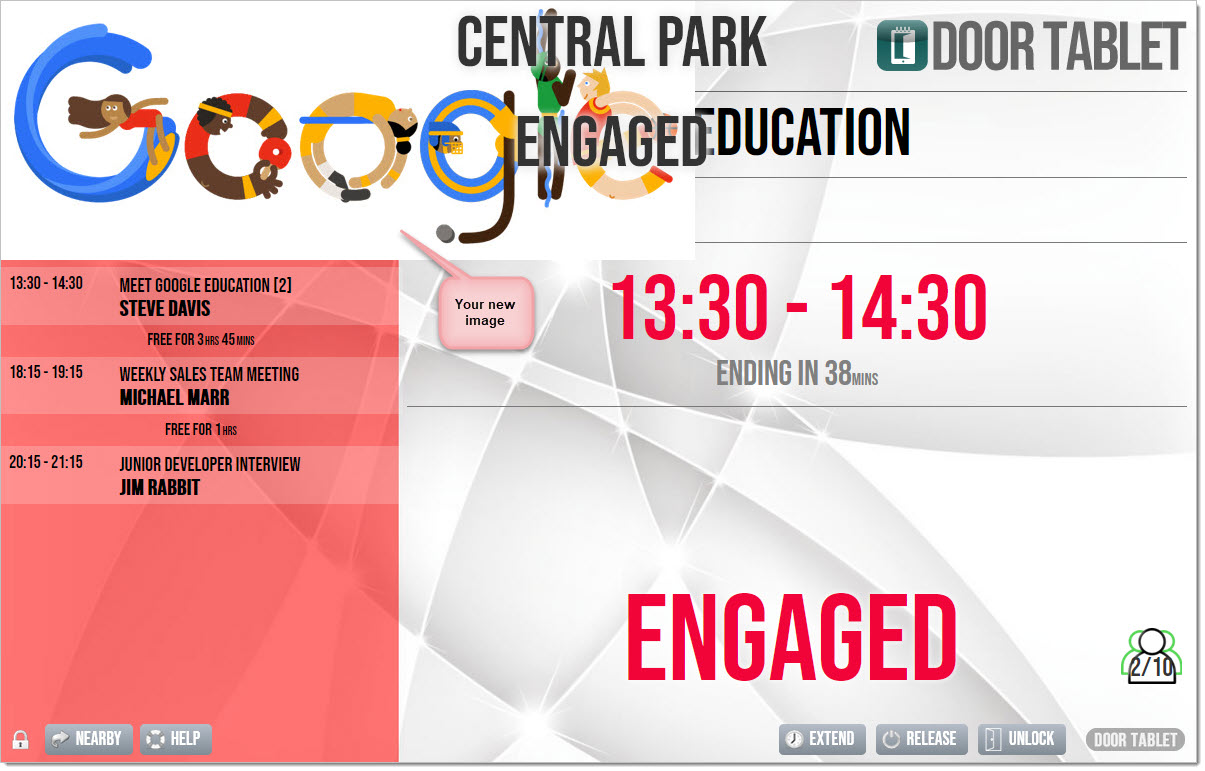
In the above example we just included an image in-line without any consideration to size and position. When the meeting shows it will look like so, and hence a bit messy:
You can start making a difference to the appearance by requesting that the image goes full width, by renaming the file to include the text "_full" in the end of the file name.
We can replace the image of the same booking, and this time just for a test instead of using an in-line image we attach the image:
Notes:
1. When an image is displayed in full, the class "roomImageApply" is removed, hence allowing the image to go full screen and be positioned top left. The same style will be applied if the room is not "full".
2. When an image is displayed in full, the class "displayTitle" is removed causing the room title to show. The same style will be applied if the room is not "full".
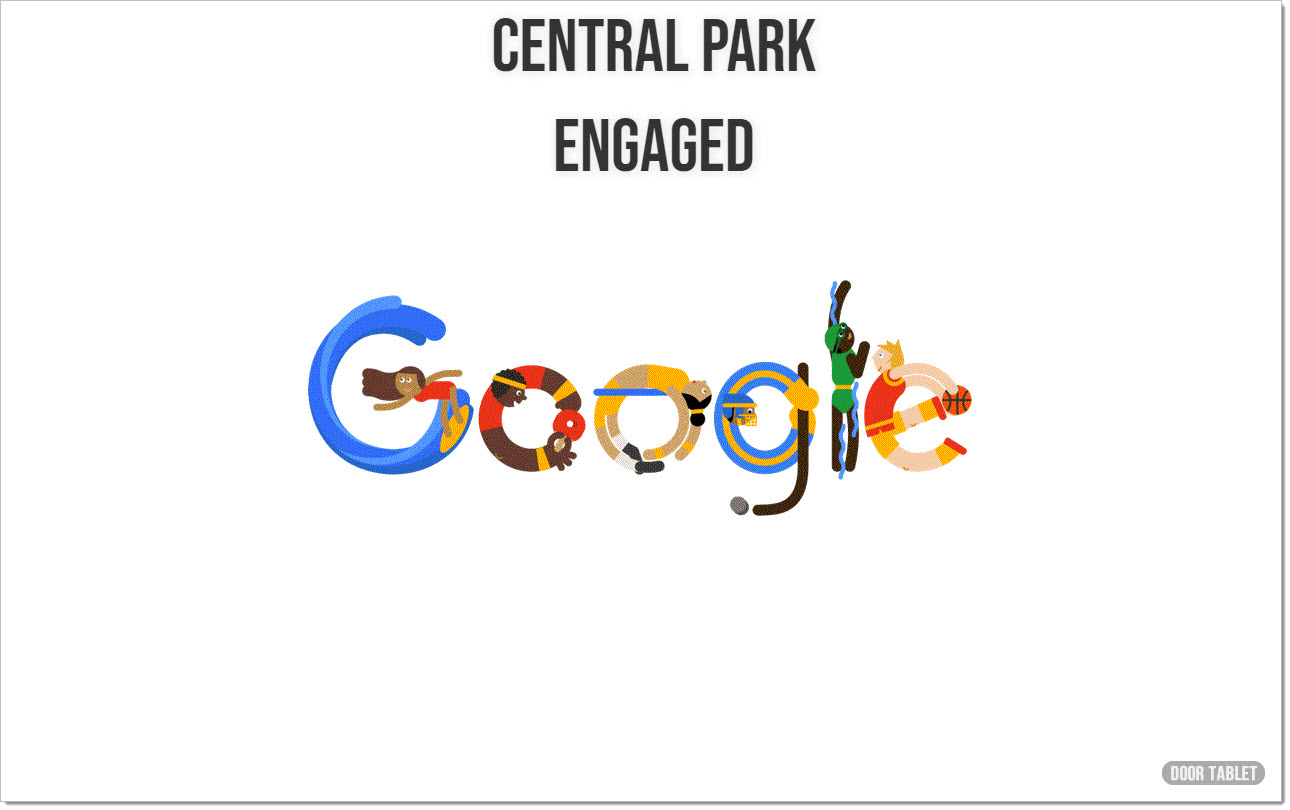
The result is below... cleaner but still requires attention:

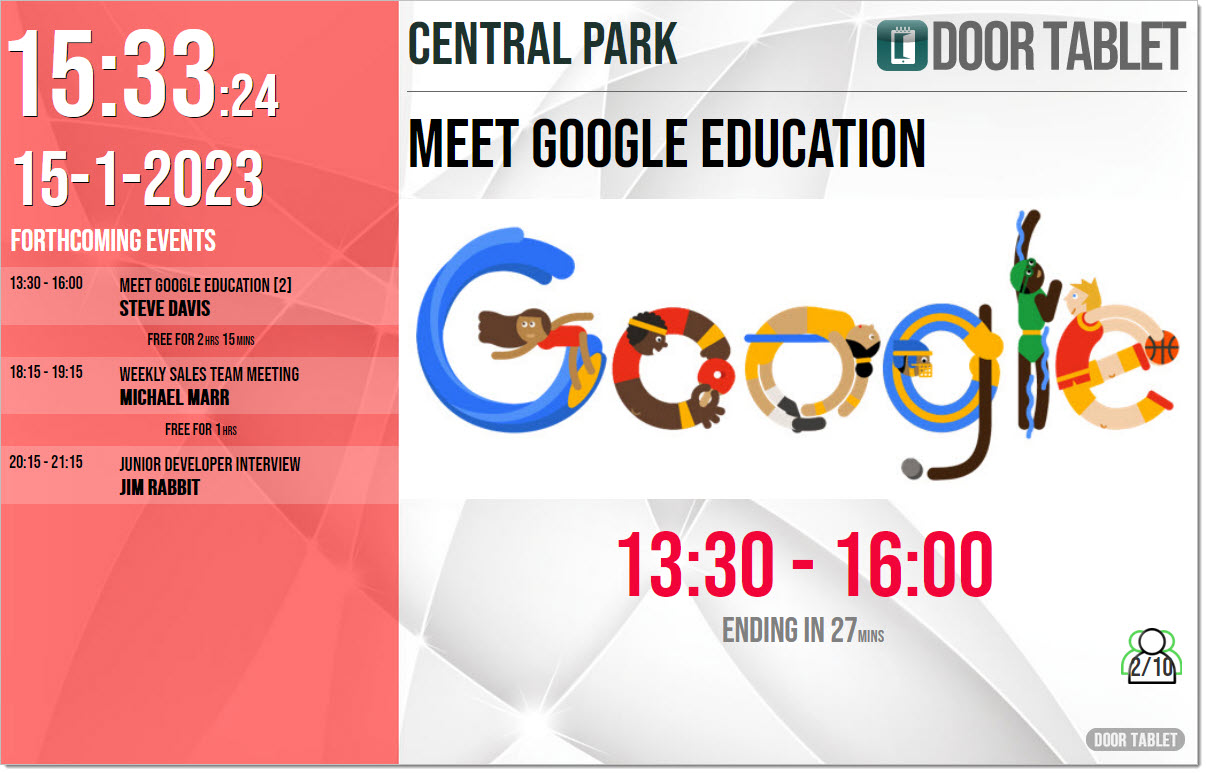
You can improve the image and match it to the size of your displays. For example if the display is 1280x800, you can attach such an image and it will use the entire screen, for example:
If you upload an image in png format for which parts are transparent, the following is easily achieved:
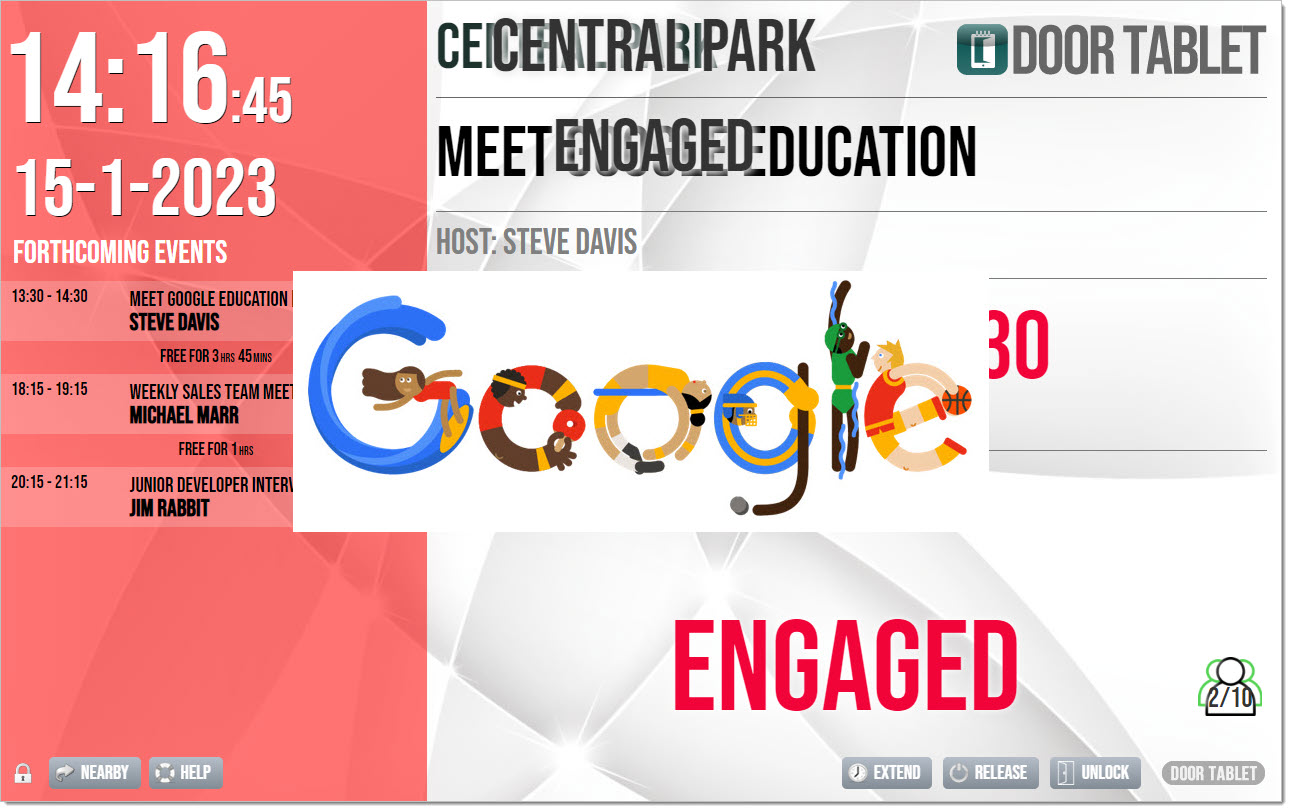
As you can see, the above shows the image in the middle of the screen, but still shows the room name and status, which looks messy due to the image transparency. To resolve this you can use the CSS which will be used while the image is showing, only.
The style sheet we use now contains this:
	.displayTitle, .displayStatus {

		top: -300px;

	}
And the result is a clean display:
Refreshing images
As we all make mistakes you could have uploaded the wrong image for the wrong meeting. No panic. The Door Tablet app will automatically check if you changed the image after the meeting has started at the following times: 1 minutes, 2 minutes, 4, 8 and 16 minutes. If you noticed the image is wrong after those times, just touch the meeting room name, or the Door Tablet mark, and the next time an image is displayed, the latest you have uploaded will show.
Positioning images and more
You can also position your image in a particular place on the display. For example, in the following display the image is small, has no transparent surroundings (as in the above), yet it is positioned in a specific location. Adding the following to our style sheet will result in the following position of the image:
.displayTitle, .displayStatus {

	top: -300px;

}


.roomImageApply {

	top: 200px;

	left: 400px;

	width: 800px;

}


#curMeetTime.meetCurrent {

	position: absolute;

	top: 500px;

	left: 600px;

	border-bottom: none;

}


#roomActions, #meetProc, #lightStatus {

  display: none;

}
The result of this setup is:
"Full" sampler
When you use a _full file to control what shows when full images are on display, you can use the following example CSS:
.displayStatus {

	top: -300px;

}
As you can see, short and simple. The CSS will cause the room status not to show, and only the room name will show.