Click on images to see them in full screen
C64BC52C3F9CCD6A802586130053800AZoom
From version 9.6 of Door Tablet you may connect to Zoom and benefit from seamless integration. The integration covers the following server technologies:
- Microsoft 365 and Exchange - all versions
- Google Workspace
- IBM Domino
Other server technologies such as Axxerion or DTSI are not currently implemented, but may be added on demand.
For Microsoft Teams integration please click here:

For Google Meet integration please click here:
The integration offers the following:
- Link meeting spaces to ZOOM
- Create sessions automatically for spaces that are set for this
- Send session information to attendees
- Create sessions for ad-hoc meetings
Please note:
- A maximum of 100 ZOOM sessions may be created per user, per day. Spread ZOOM user's emails across multiple spaces if needed
- If you are using a ZOOM Master Account, you may be given multiple sub accounts. Use these across your spaces
- You may override the Sub Account and User email at space level
- By default, sessions are created when meetings are first seen by Door Tablet. If you choose to delay, sessions will be created some minutes before your actual meetings begin. You choose how long before
- In order to send invitations to attendees, you must 'Get Attendees for all meetings', in the System Profile. This feature may not be available on all platforms, so for those only, the host will get the email
Platforms
Door Tablet is integrated with ZOOM for the following platforms:
- Microsoft Exchange and Microsoft 365
- Google Workspace
- IBM/HCL Domino
Other platforms, such as DTSI, may be added on demand
Link Door Tablet to your Zoom account
Door Tablet does NOT assume that you have an account with Zoom Rooms; it only requires that for each room you wish to enable with this feature that the Zoom account name is specified. You may use the same account on multiple rooms.
Create a Door Tablet app in the Zoom Marketplace
Login to your Zoom account and access the Marketplace as shown here:
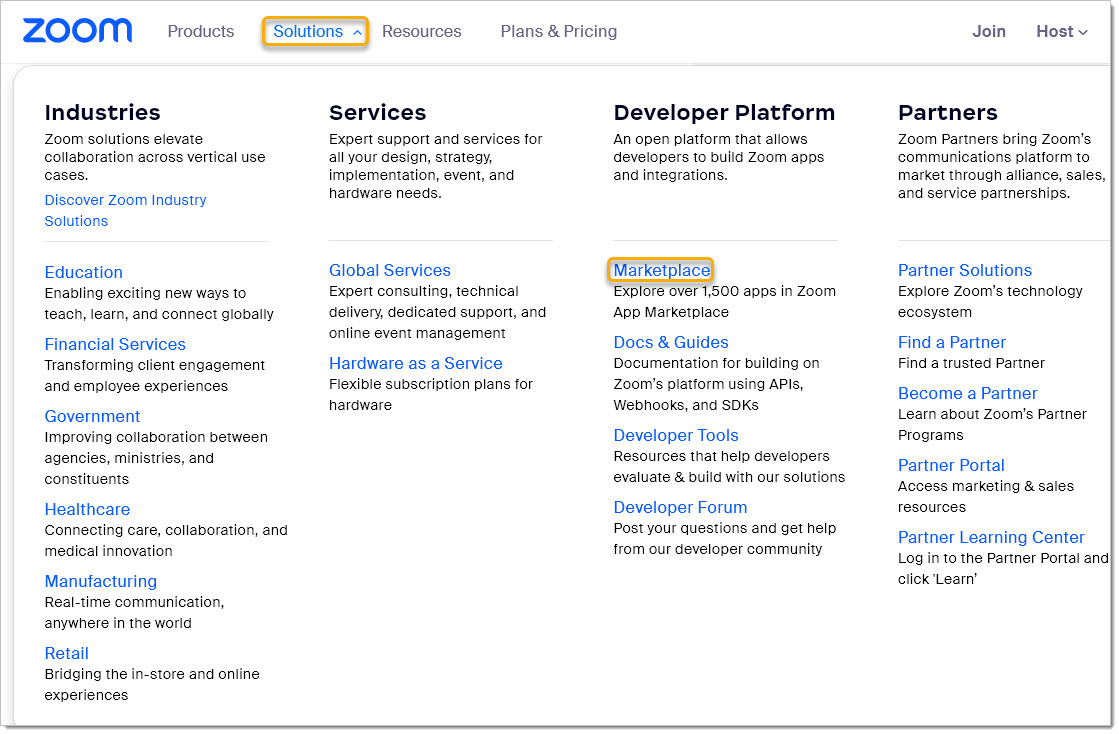
Or click here to access the Marketplace directly:
https://marketplace.zoom.us
Notes:
- If you are using a Zoom Master Account, use that account for creating the interface to ZOOM. Sub accounts will be used, if you have created those, inside individual Door Tablet rooms.
- If you have already created a JWT based application on your account, you can use the same keys in Door Tablet. A Zoom account may have only one set of JWT keys.
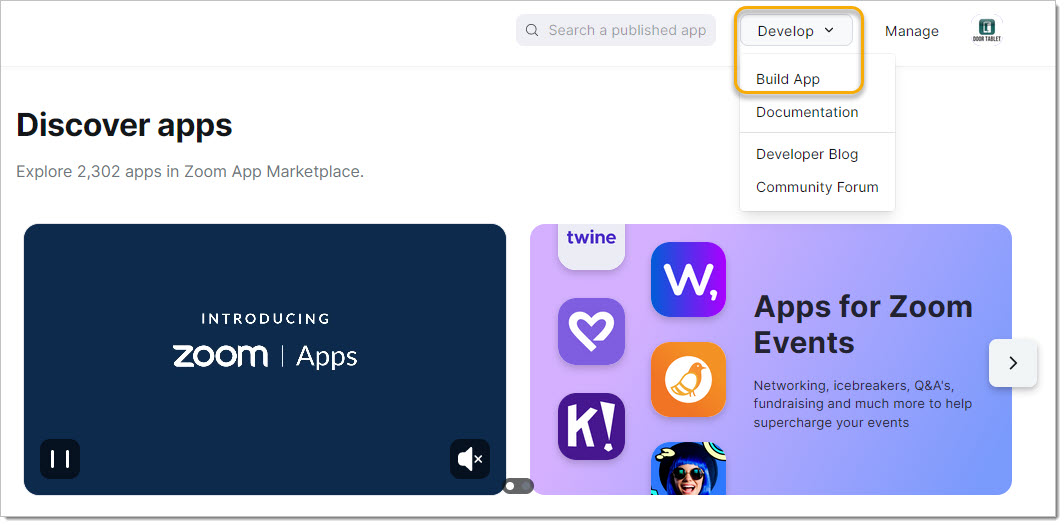
Now, click on Develop/Build App, as follows:
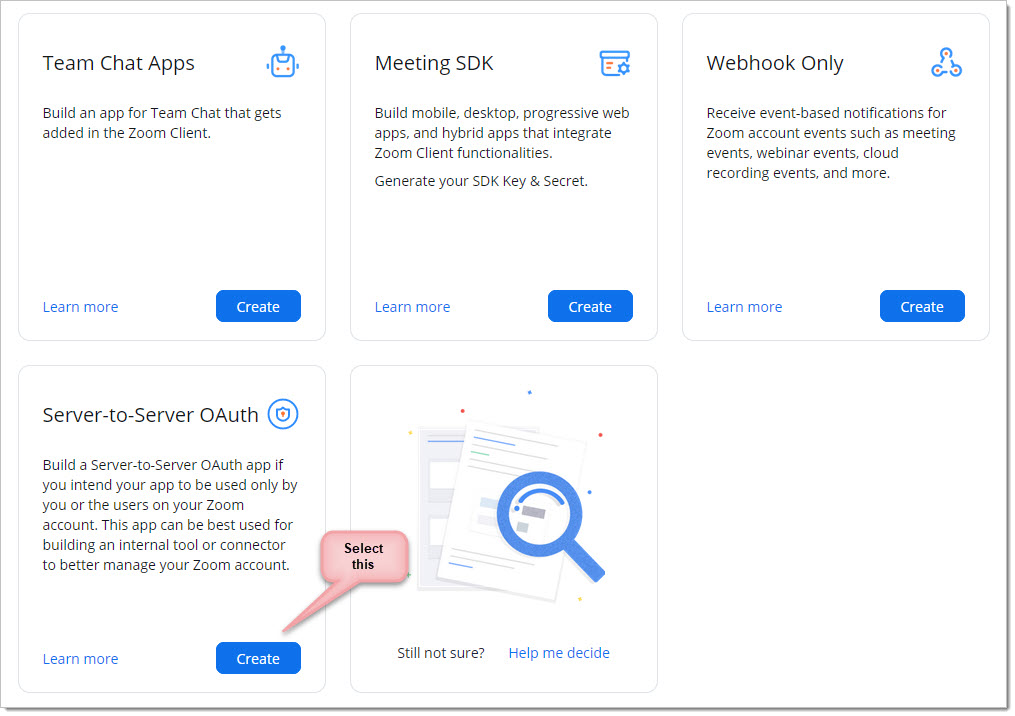
You now need to select the right type of application, select JWT:
Name the application

You may add a logo if you like... save as:
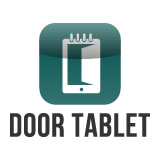
Fill the following information:

Click continue:
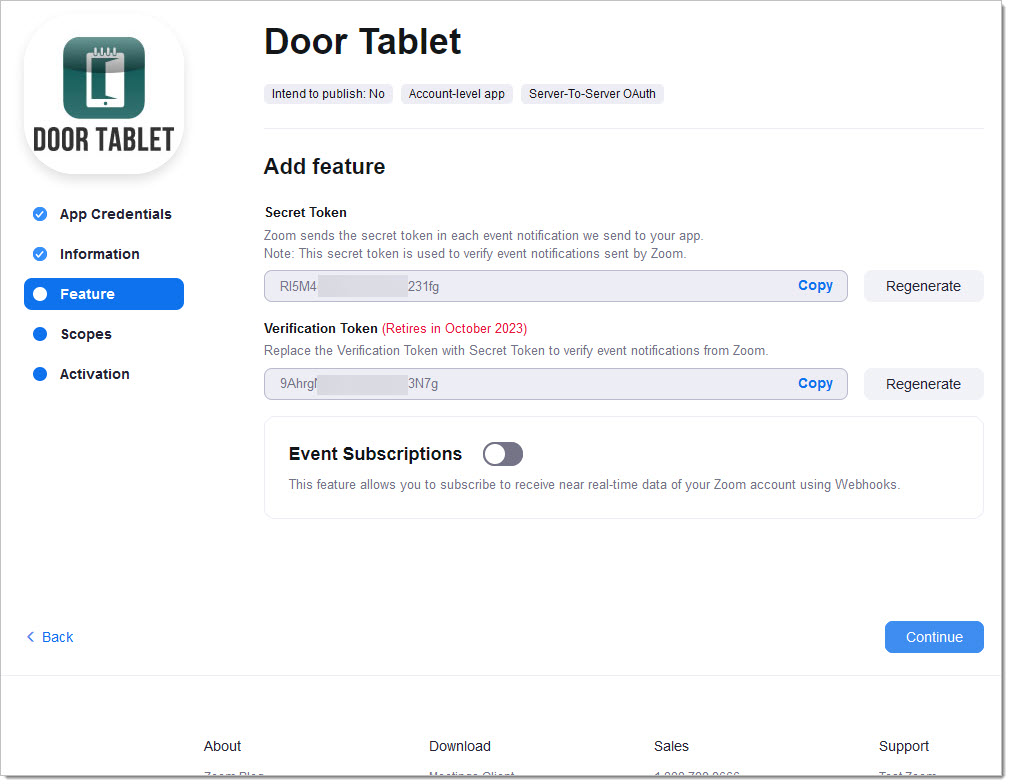
Add scopes...
Final scopes shown here:
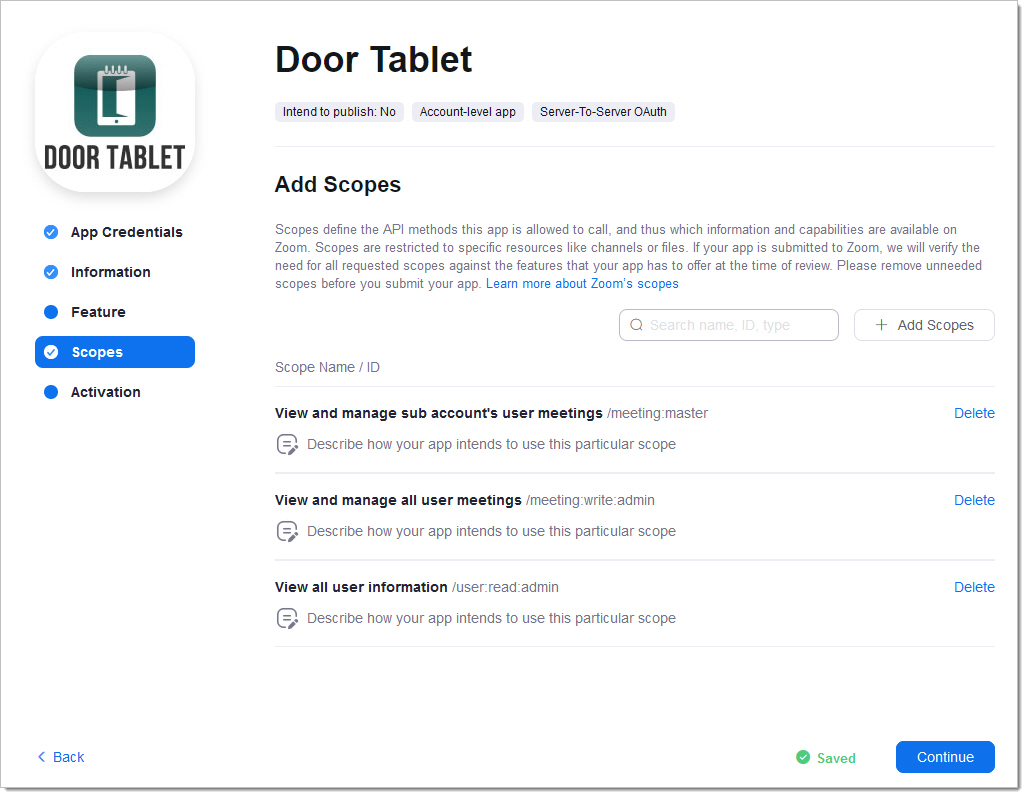
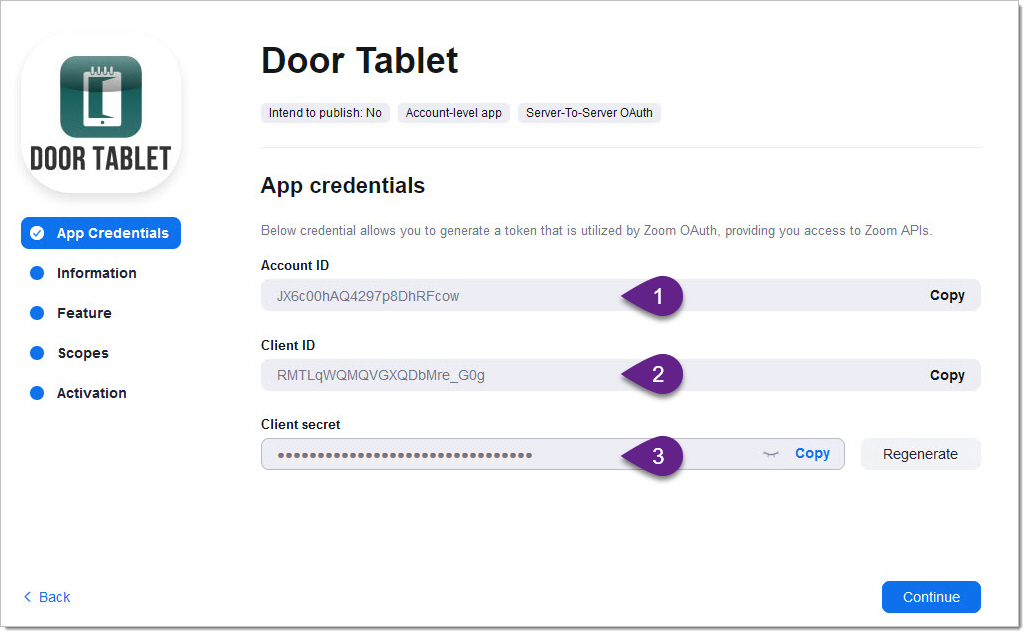
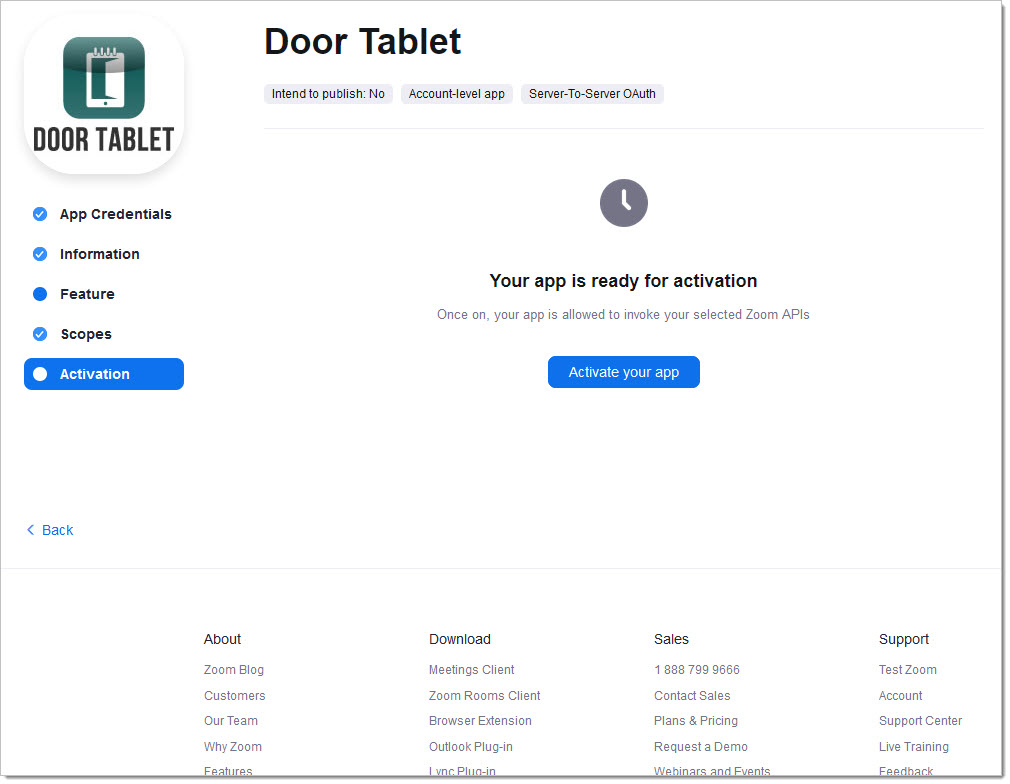
Your App Credentials will now be created and be ready for you. You will need these when filling in the Door Tablet Zoom integration details. You are now ready to activate the app.
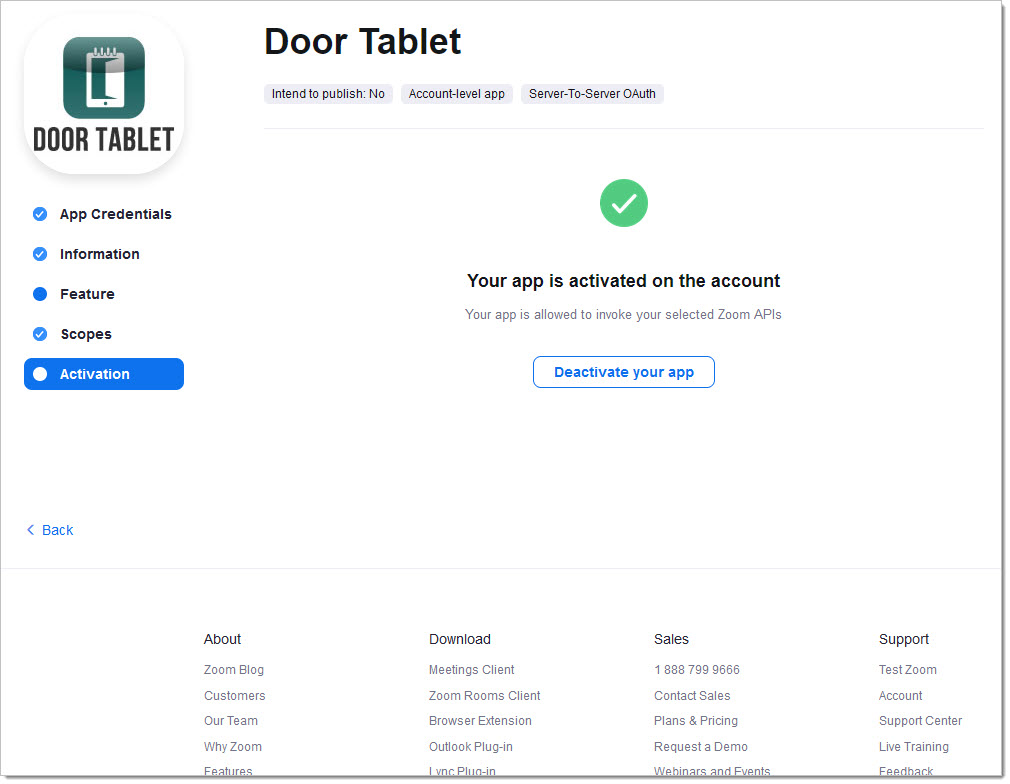
The result of your work:
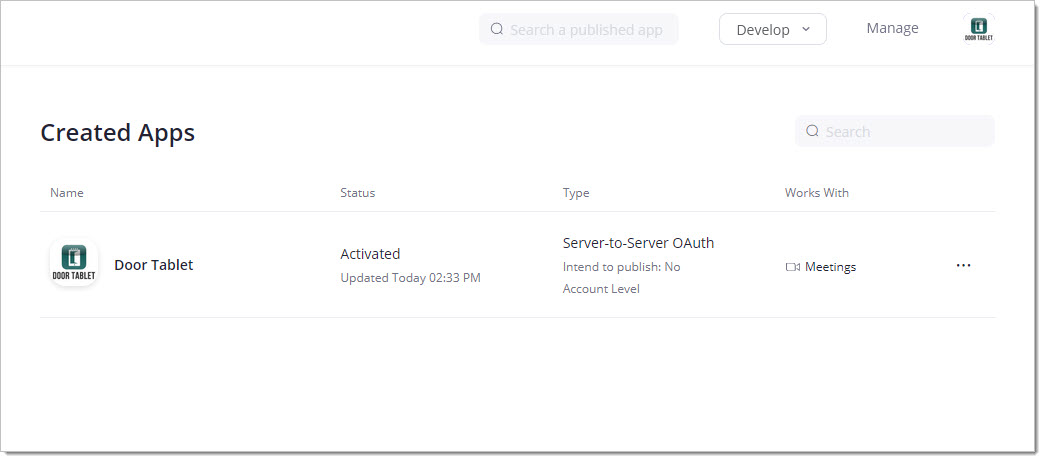
To remove an existing Server-to-Server OAuth app, go to App Management > Created apps and click Remove App in the Action menu.
Enablement of the app from your Zoom account
The last action you need to take is as follows...
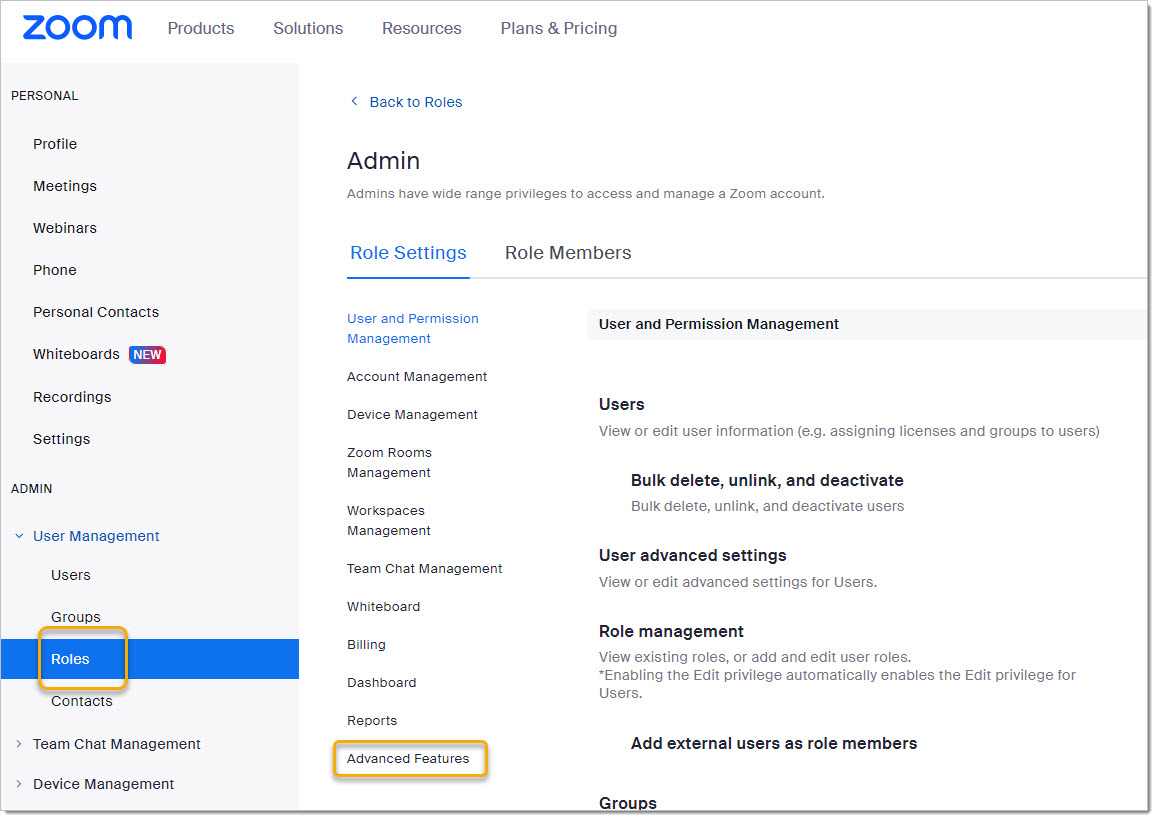
Navigate to:
- ADMIN/User Management/Roles
- Advanced Features
- Zoom for developers
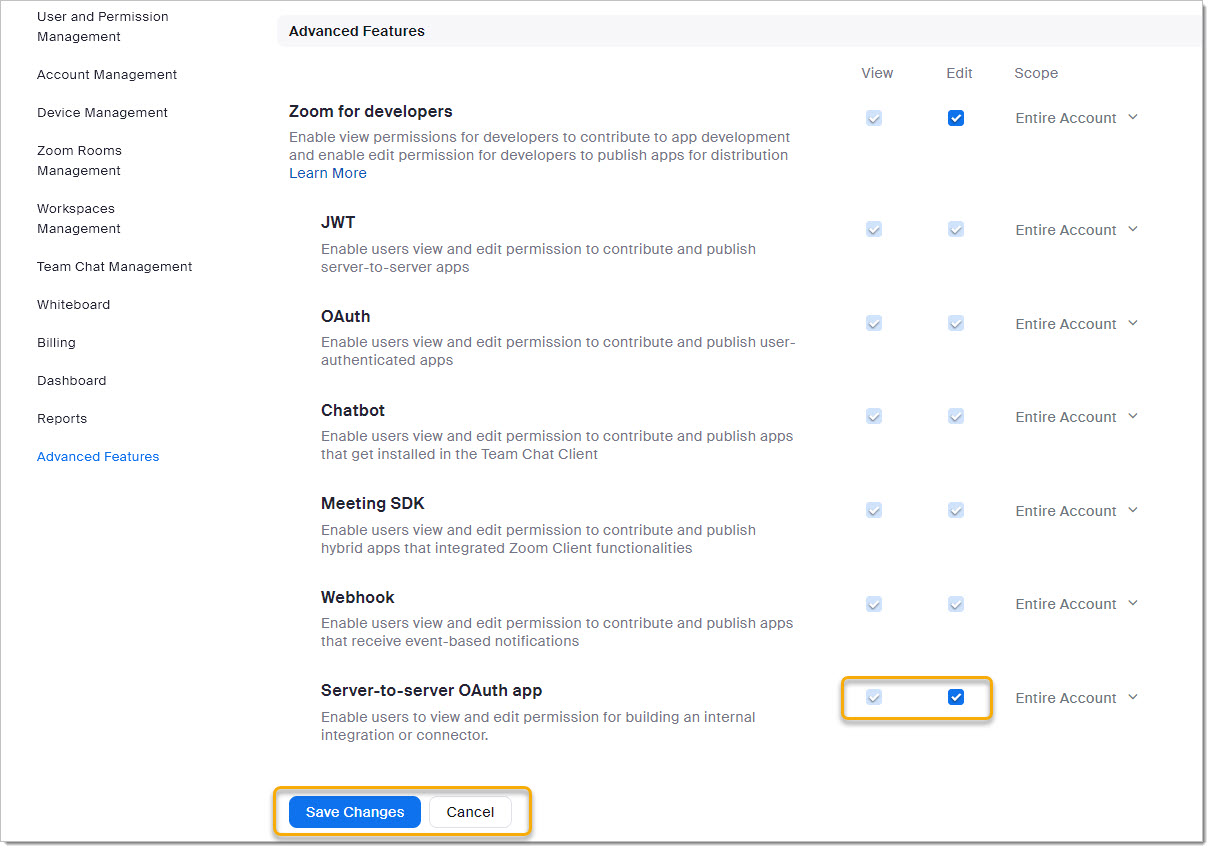
Check the Server-to-Server OAuth App as follows... and save your settings:
 Configure Door Tablet to use ZOOM
In these sections we cover what you need to do in order to establish a connection between Door Tablet and ZOOM. You will also set the behaviour of Door Tablet and make choices on how you wish the integration to work for you.
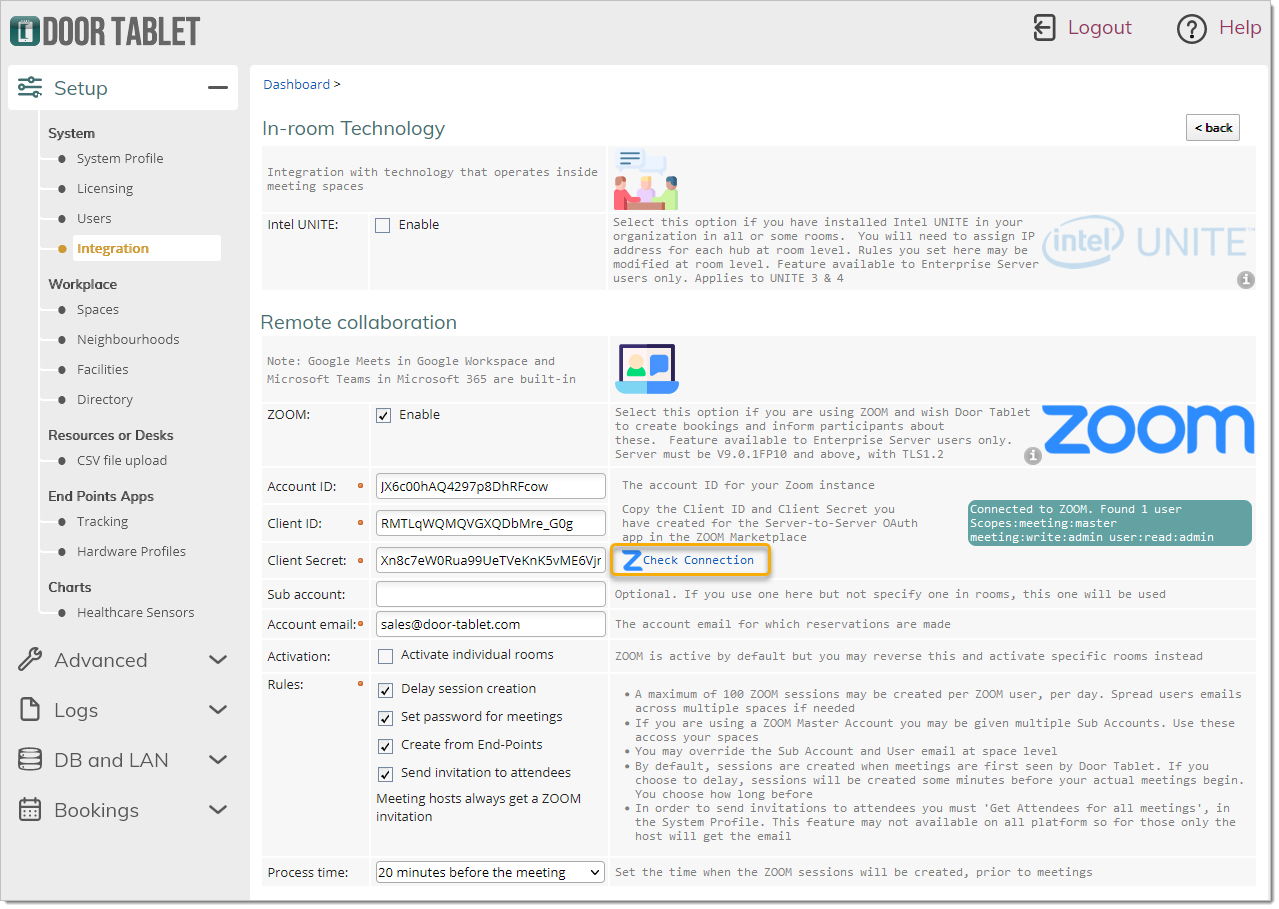
Connect to ZOOM
From the Door Tablet dashboard, select Integration. Please not that you must use the Door Tablet Enterprise Server and that you have purchased a licences that covers the integration with ZOOM.
The integrations show... select ZOOM:
Copy the Keys from the ZOOM Marketplace App above.
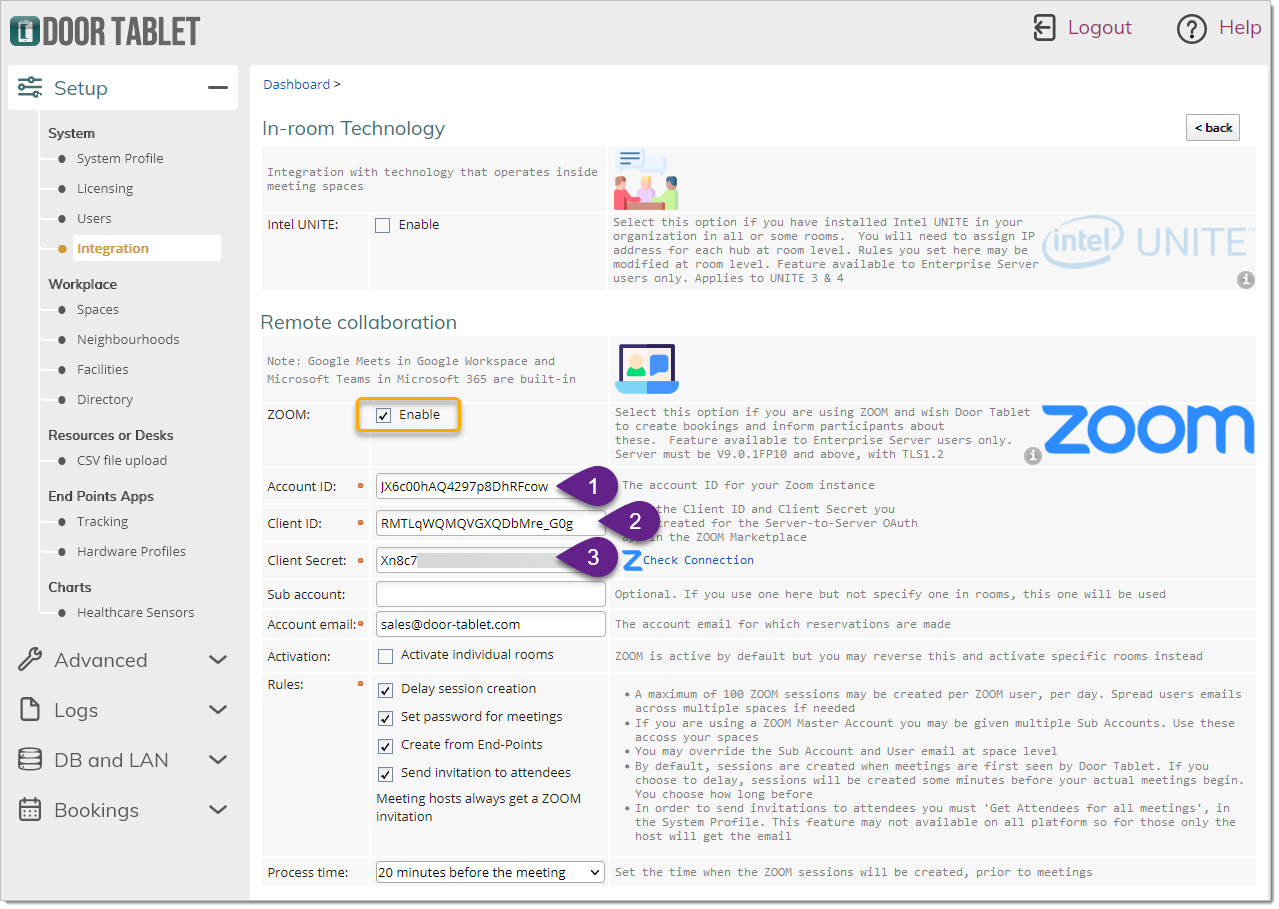
Once the keys are copied, you may test the connection:
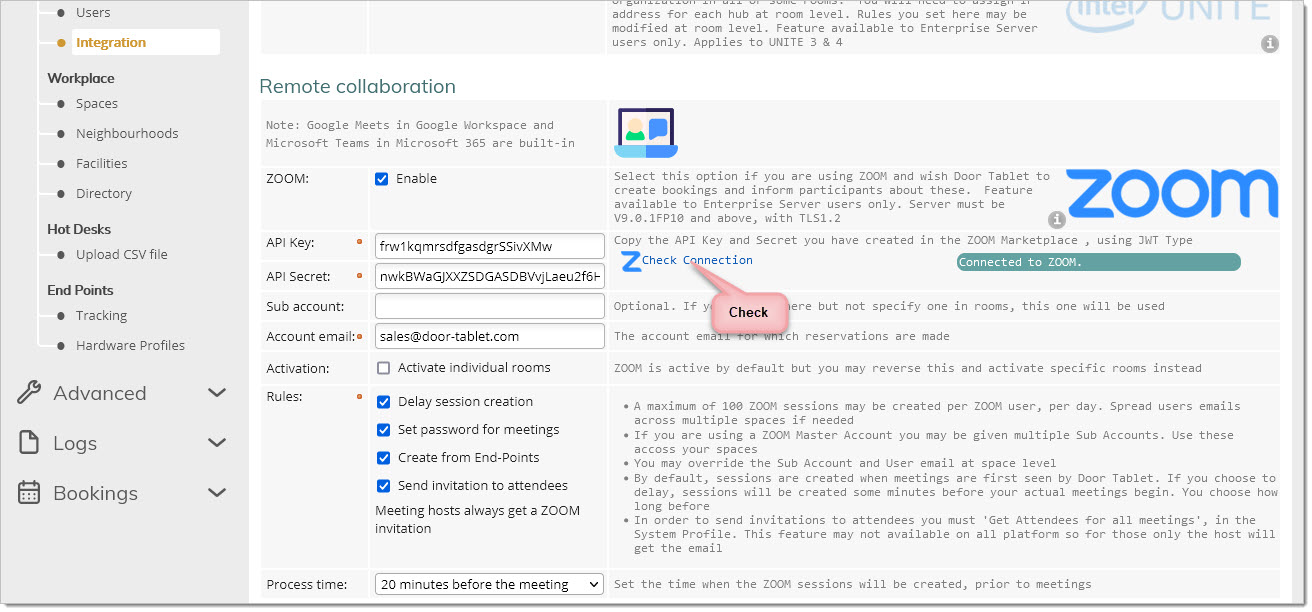
If there is a problem with your keys or the connection, Door Tablet will show the error like so:
 Controlling which spaces participate in ZOOM processing
You may control which spaces are active for ZOOM as follows:
- Space level - this offers both automated and ad-hoc features
- Neighbourhood level - automated ZOOM sessions
Selecting spaces
You can decide if by default these are active or inactive, and mark the exceptions in the actual spaces. For example, if you wish to test the features on one room, you can set the rule to be "Activate individual rooms", and then activate that test room. If you would like to activate all the rooms, but wish to disable specific rooms for example the board room, un-tick "Activate individual rooms", and disable ZOOM for the board room.
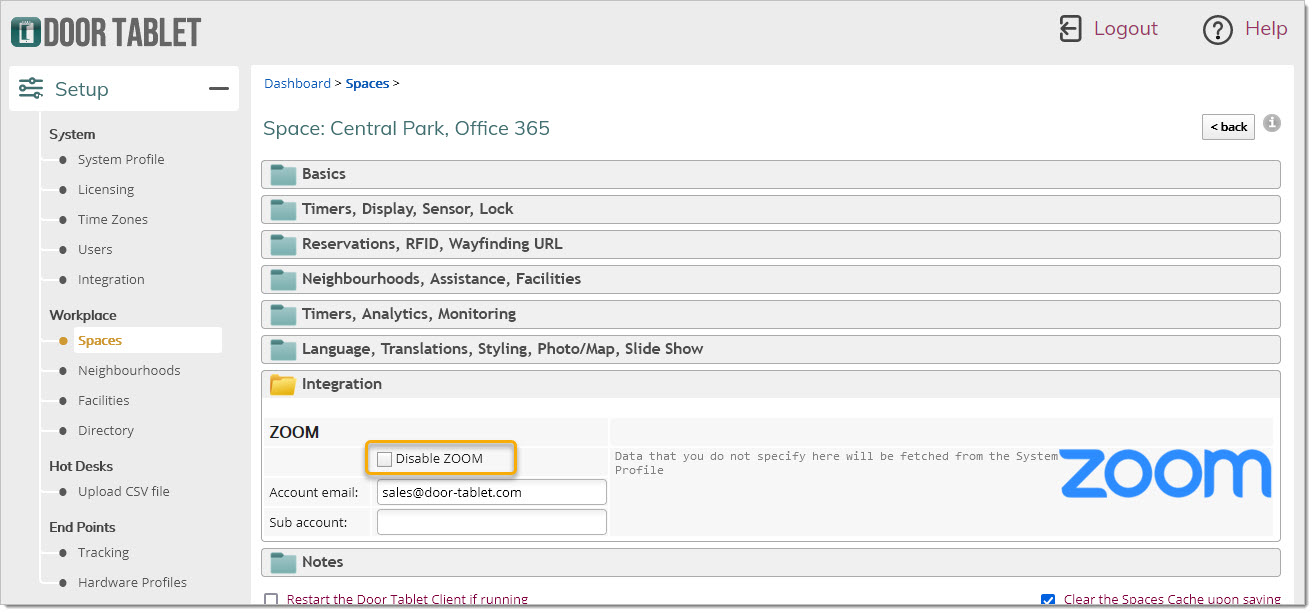
Enabling or Disabling spaces
In each resource, once ZOOM is enabled in the Integration area, the following will show. If you enabled ZOOM globally you may disable it locally:
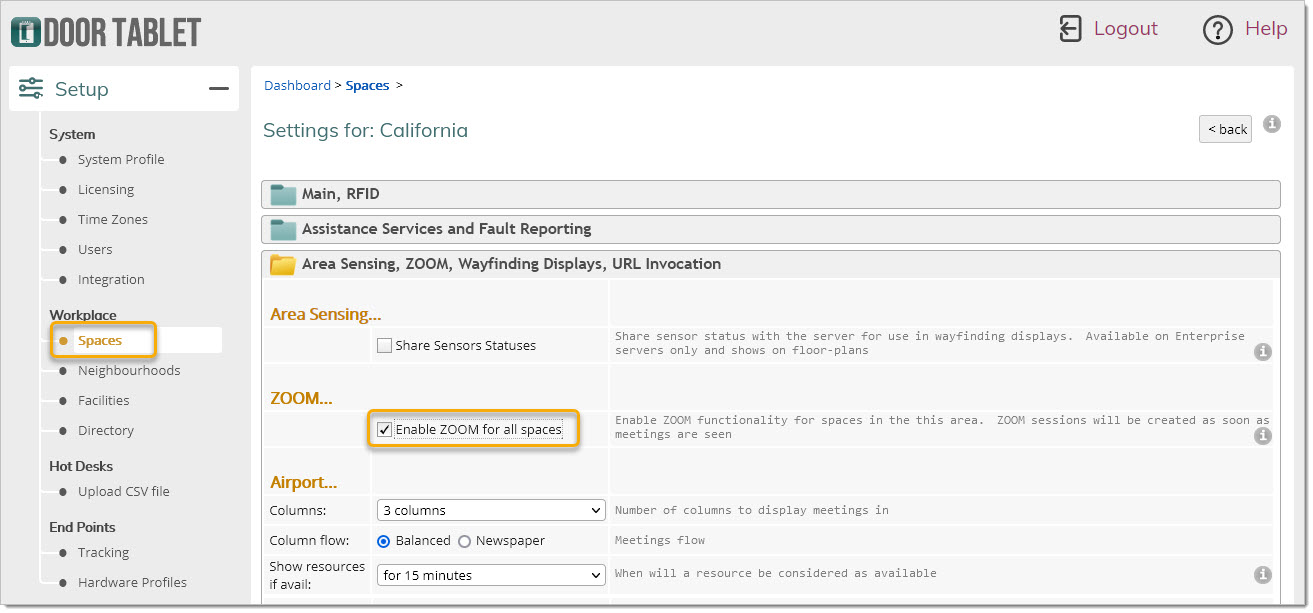
Select a neighbourhood and amend its settings to enable ZOOM for all the spaces within. Please note that this option make it possible to create ZOOM sessions to all the spaces without enabling the spaces individually. Furthermore, the delay functionality only works with single Room Displays, hence ZOOM sessions are created as soon as a meeting is seen by Door Tablet
 Creating ZOOM session when creating ad-hoc meetings
When creating ad-hoc meetings from the tablet, you may wish to invite someone to join you who is not in the office. Door Tablet allows you to do so easily:
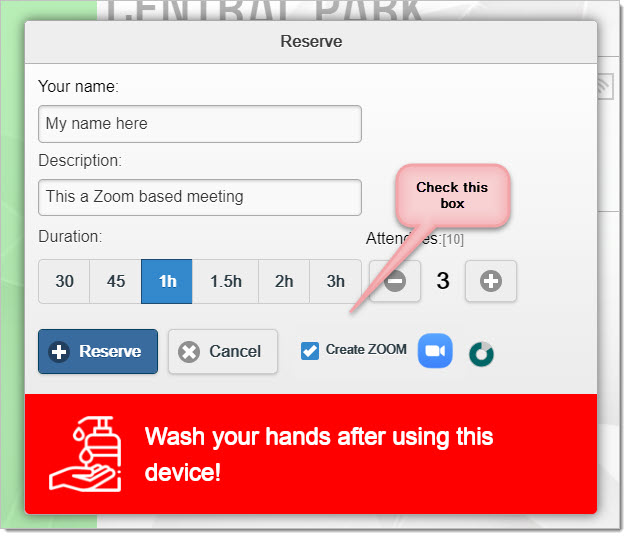
Once the request is submitted the following will show...
 Note:
Note: ZOOM sessions for ad-hoc meetings are created without a password.
You may use a QR reader to obtain the full link to join your meeting over ZOOM.
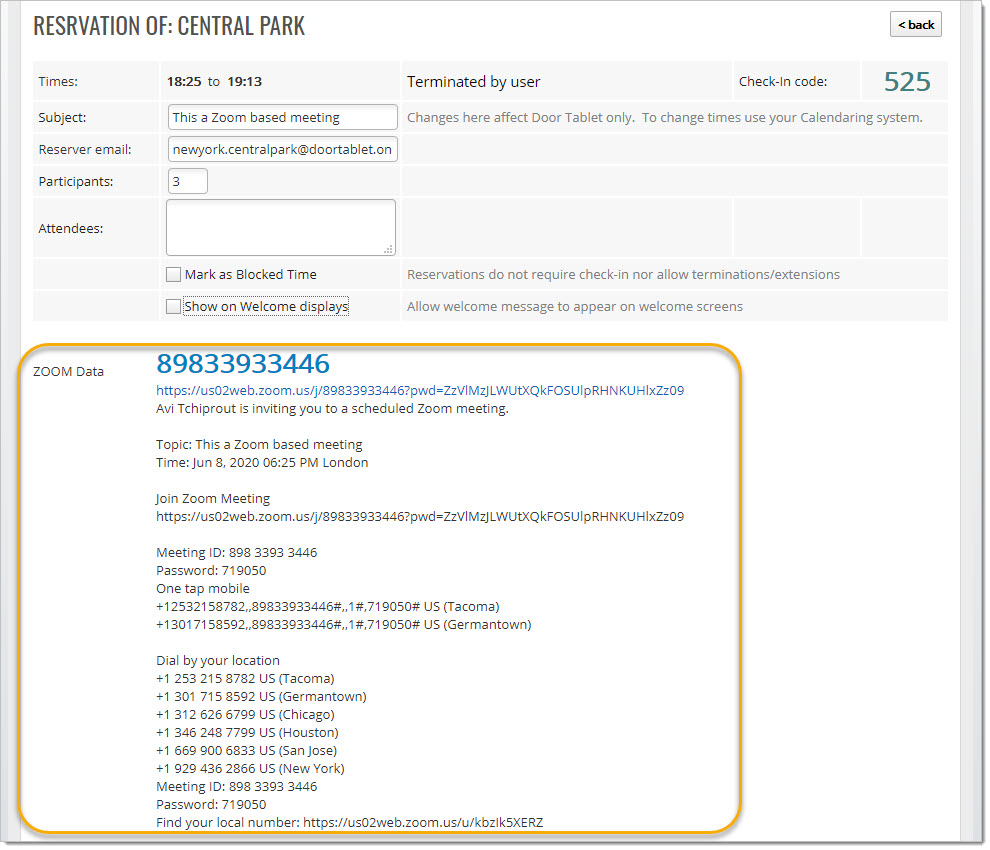
Meetings for which a ZOOM session was created will be stored with reservations:
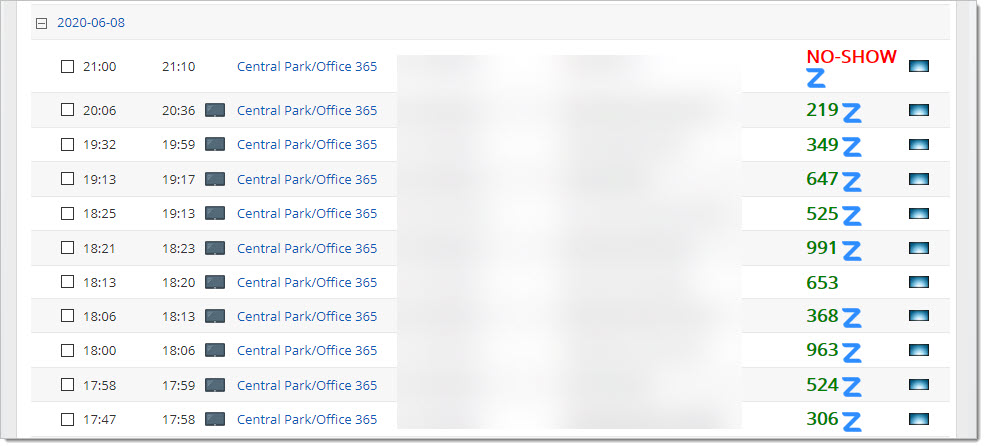
When you open a record, the full data of the ZOOM session is visible: