n
anonymousdoortablet/dthelp.nsfsensors-config
Protected content
| 273pages | Our help system contains many pages and videos for you to consume. This includes the complete information on how Door Tablet works, all its features and options, and of course the many benefits for your business. Door Tablet School offers many videos too. |
|
 |
| 
Click on images to see them in full screen
95A63B889BD35F368025807600611DFCHardware setup
Configuration of Sensors is performed using a local PC. The general steps are:
- Installing the Service software
- Installing the Sensors Viewer
- Attach the Device Hub to your PC using a USB cable
- Run the device viewer and configure IP addresses and ports
- When running on a Windows end-point and connecting using USB only, install the software on each end point
The IP address and the UID you get in this process is required for the Door Tablet software configuration. Only the UID is required if connecting the sensors using USB on Windows end-points.
Using Windows End-points
When using Door Tablet WM, Door Tablet MM and Intel UNITE Hub you can configure the sensor to work using a USB cable, instead of placing the sensor hardware on the LAN. When configuring such a set-up, all network related information may be ignored. Note: When using this configuration you need to install the software listed below on the end-point. This will be required if you place the sensors on the network, where you only need to install the software on the PC where you perform sensor configuration. See here:  Software download and installation
There are two programs you will need to install, both are available from the Door Tablet website and are provided in one zip file. The zip file contains two installers and both need to be installed onto a Windows PC. One of these will be installed and run as a service. The other one, the viewer, can be used whenever you wish to configure sensors for your network.
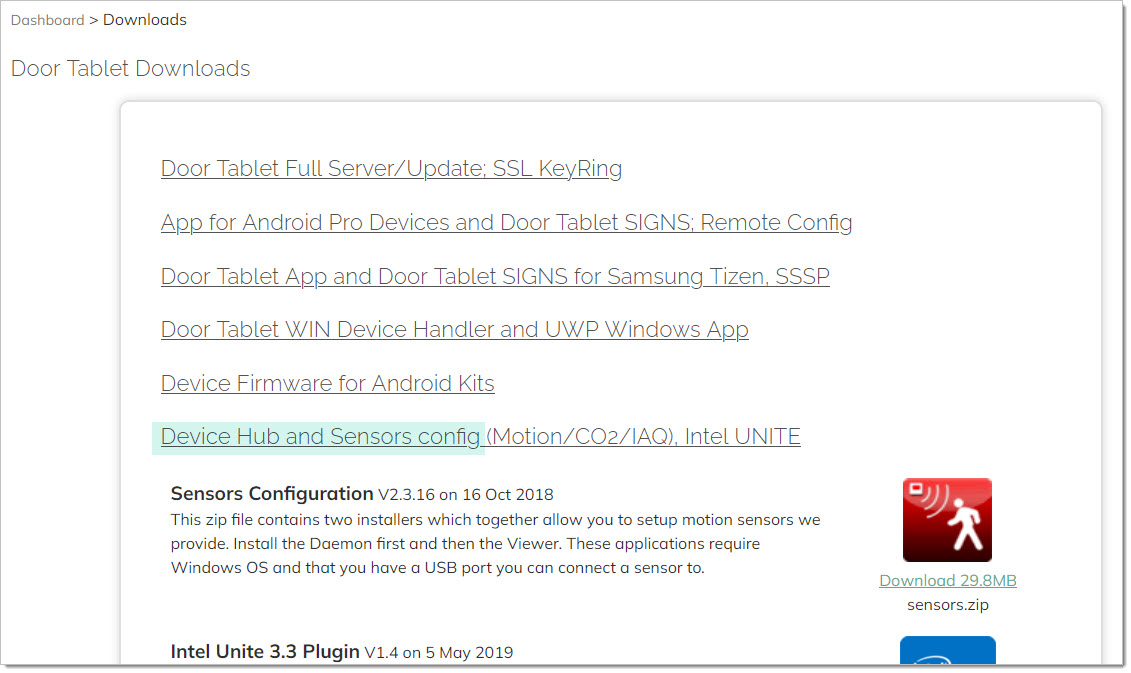
Downloads in the door-tablet.com downloads area:
Software download and installation
There are two programs you will need to install, both are available from the Door Tablet website and are provided in one zip file. The zip file contains two installers and both need to be installed onto a Windows PC. One of these will be installed and run as a service. The other one, the viewer, can be used whenever you wish to configure sensors for your network.
Downloads in the door-tablet.com downloads area:
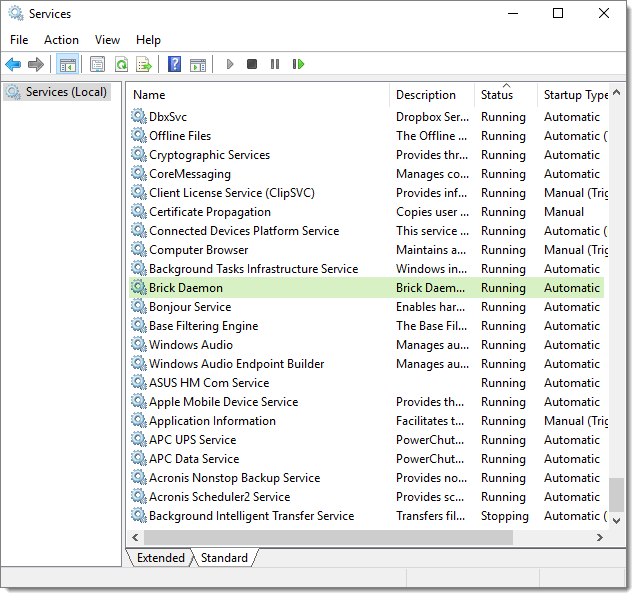
 The installed service is called "Brick Daemon"
 The second program is the Brick Viewer - which you can use for configuration. The Brick Viewer will appear on your installed applications.
Configure your Sensors
To configure your sensors do the following:
The second program is the Brick Viewer - which you can use for configuration. The Brick Viewer will appear on your installed applications.
Configure your Sensors
To configure your sensors do the following:
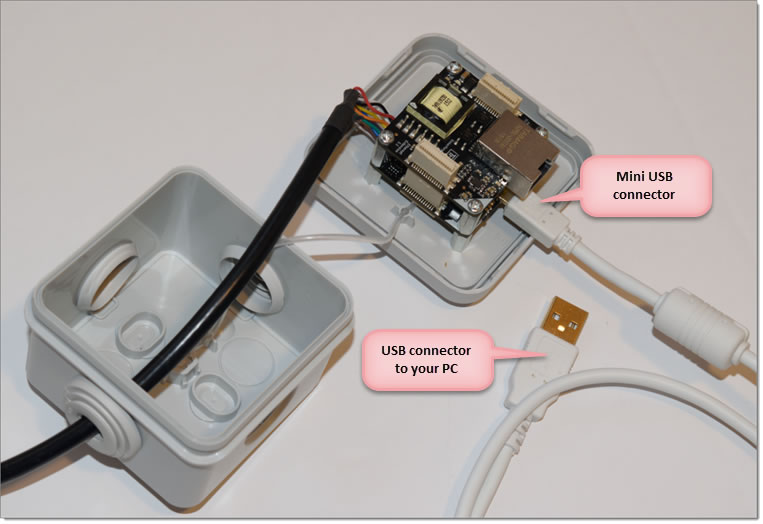
- Open the Device Hub (use a screwdriver to loosen the four corners, do not undo the two silver screws)
- Locate the mini USB socket
- Use an appropriate USB cable to connect the electronics to your PC
- Run the "Brick Viewer"
 Wired Sensor
A wired sensor comes in two types: PoE and LAN+USB Power. The following configuration applies to both. When connecting to a PoE sensor, the USB cable provides the power. Later when you connect the PoE cable this will be the only cable used.
Wired Sensor
A wired sensor comes in two types: PoE and LAN+USB Power. The following configuration applies to both. When connecting to a PoE sensor, the USB cable provides the power. Later when you connect the PoE cable this will be the only cable used.
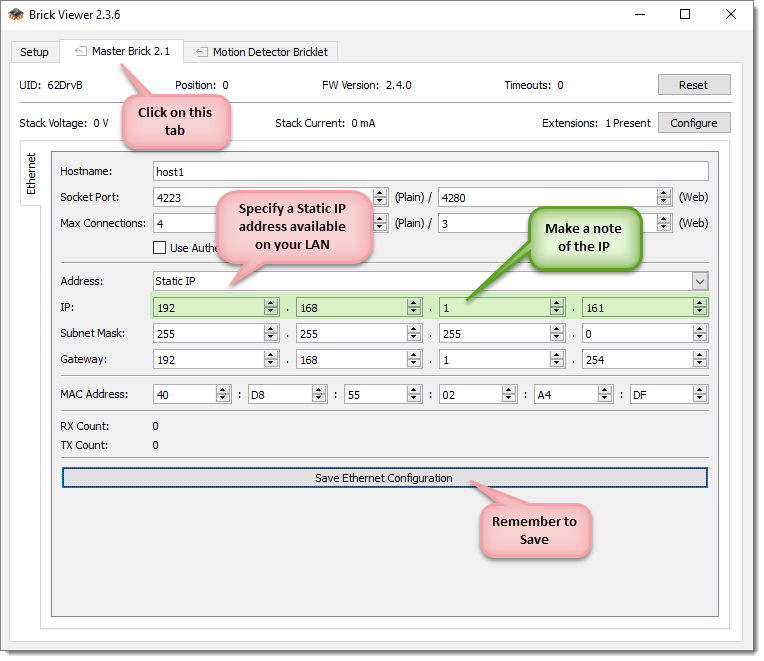
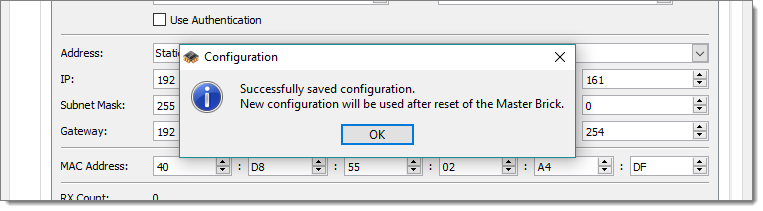
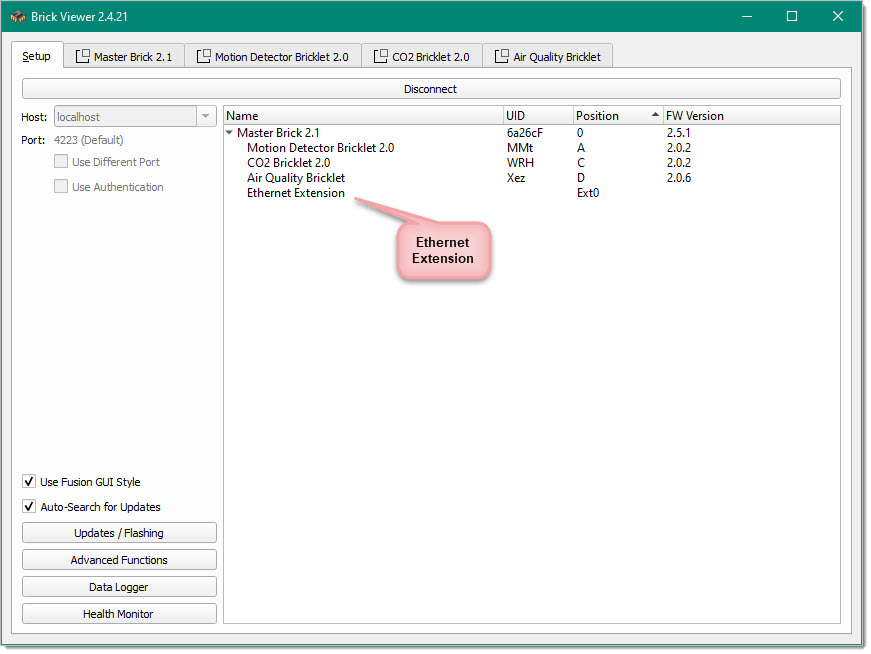 Switch to the Master Brick tab:
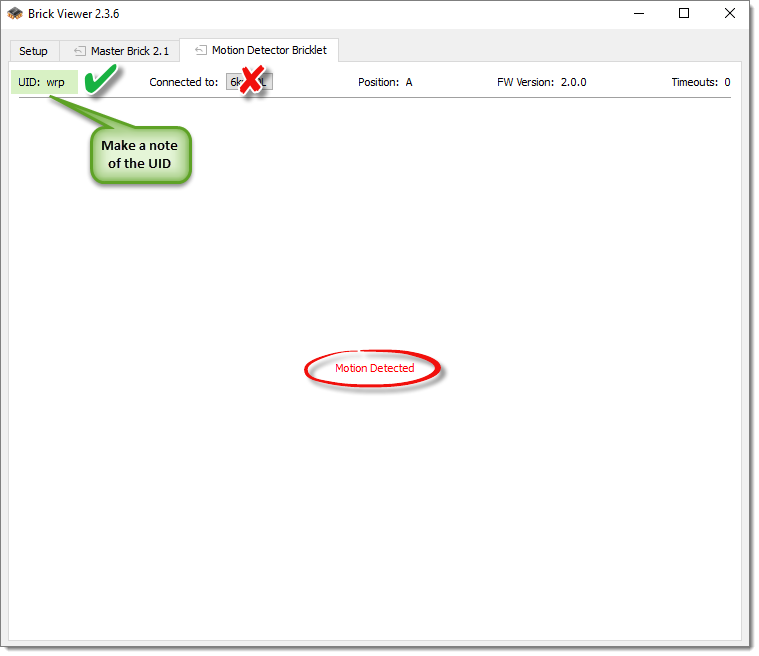
 Click on the Motion Detector Tab:
 Make a note of the IP address and Unique ID (UID) of the Motion Detector.
Note: When connecting the hardware to the network wire with the PoE feed and the mini USB, connect the network first and wait for DHCP to obtain the address (say 3 seconds). Then connect the mini USB cable.
Wi-Fi Sensor
Connect your Wi-Fi sensor to your PC using the USB cable. At the end of this configuration you will end up with an IP address and a Unique ID (UID) for the Motion Detector.
Make a note of the IP address and Unique ID (UID) of the Motion Detector.
Note: When connecting the hardware to the network wire with the PoE feed and the mini USB, connect the network first and wait for DHCP to obtain the address (say 3 seconds). Then connect the mini USB cable.
Wi-Fi Sensor
Connect your Wi-Fi sensor to your PC using the USB cable. At the end of this configuration you will end up with an IP address and a Unique ID (UID) for the Motion Detector.
 Switch to the Master Brick tab:
 Click on the Motion Detector Tab:
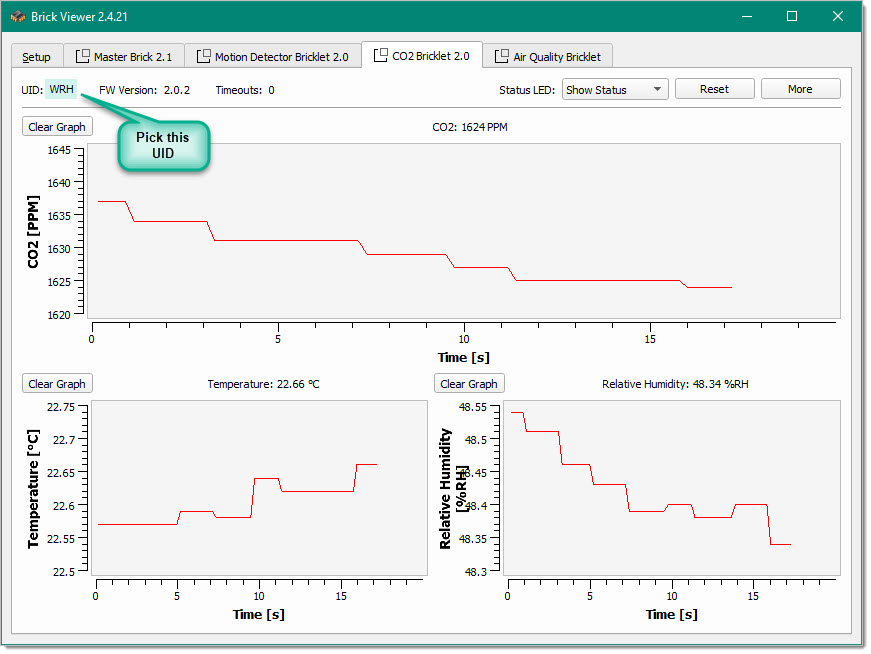
 Repeat the same data collection for the Air Quality and CO2 sensors:
 Make a note of the IP address and Unique ID (UID) of the Motion Detector.
Note: If you install the sensors and connect them to a Windows end-point, you can use a direct USB connection and ignore all networking related information.
Make a note of the IP address and Unique ID (UID) of the Motion Detector.
Note: If you install the sensors and connect them to a Windows end-point, you can use a direct USB connection and ignore all networking related information.