n
anonymousdoortablet/dthelp.nsffloorplans-routes
Protected content
| 249pages | Our help system contains many pages and videos for you to consume. This includes the complete information on how Door Tablet works, all its features and options, and of course the many benefits for your business. Door Tablet School offers many videos too. |
|
 |
| 
Click on images to see them in full screen
7CA8B1E8A2211B8A80257F4E005BD0B8Floor Plan Routes
From Door Tablet V10.24 Floor plans can now show:
- Agenda for each entry in the legend
- Route from the location of the display to the selected workspace
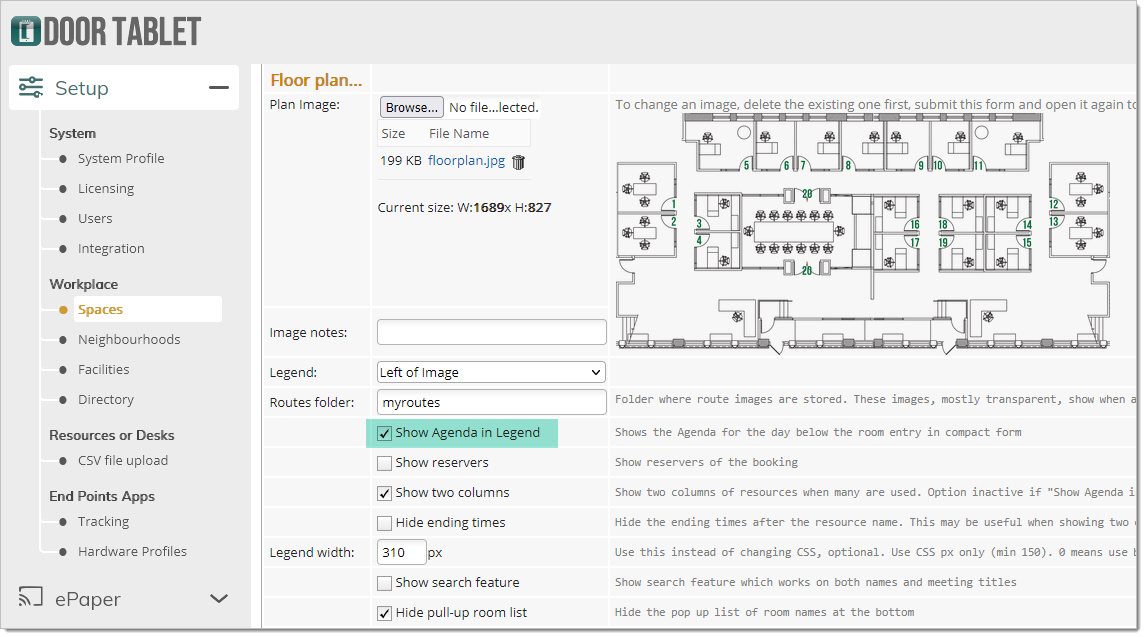
Show Agenda
To show events below the name of each room in the agenda, select the following. Open the Neighbourhood you wish to affect and select the check box as shown below:
 The result...
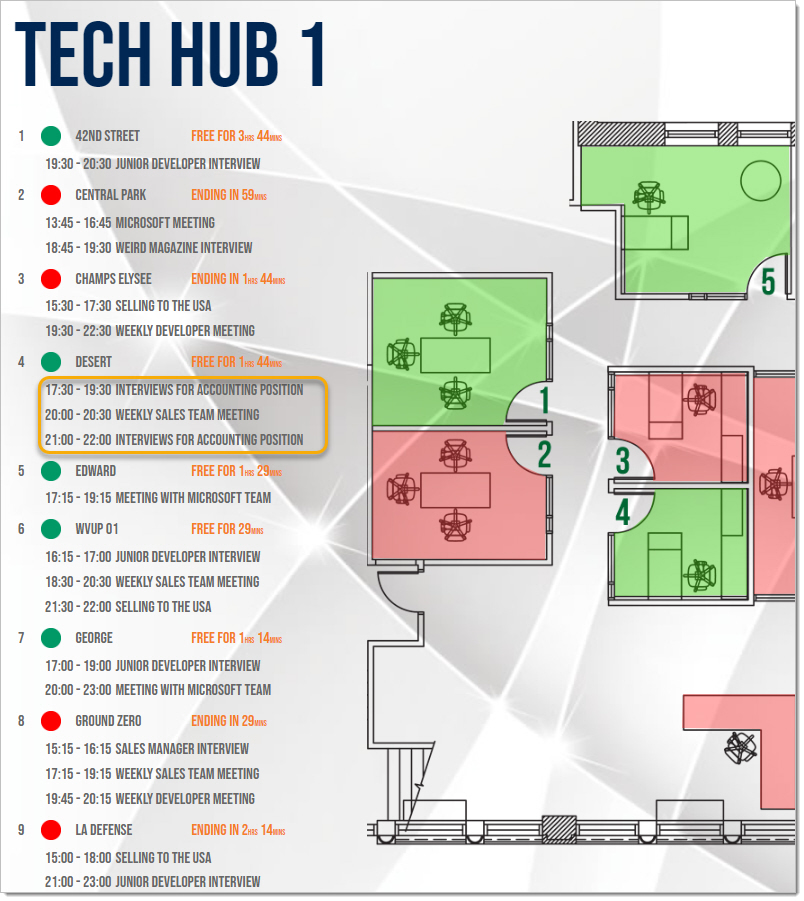 Note: you may style this information using CSS.
Create Routes for your Floor plan
Door Tablet will show the route to walk to the resource upon touching the resource, its agenda, or using the room selector. The following preparations are required:
Note: you may style this information using CSS.
Create Routes for your Floor plan
Door Tablet will show the route to walk to the resource upon touching the resource, its agenda, or using the room selector. The following preparations are required:
- Use a graphics package to create images with the paths that represent the routes
- Save the images you created with a specific name, as dictated by the system
- Upload the above images to the server
- Test your Floor plans
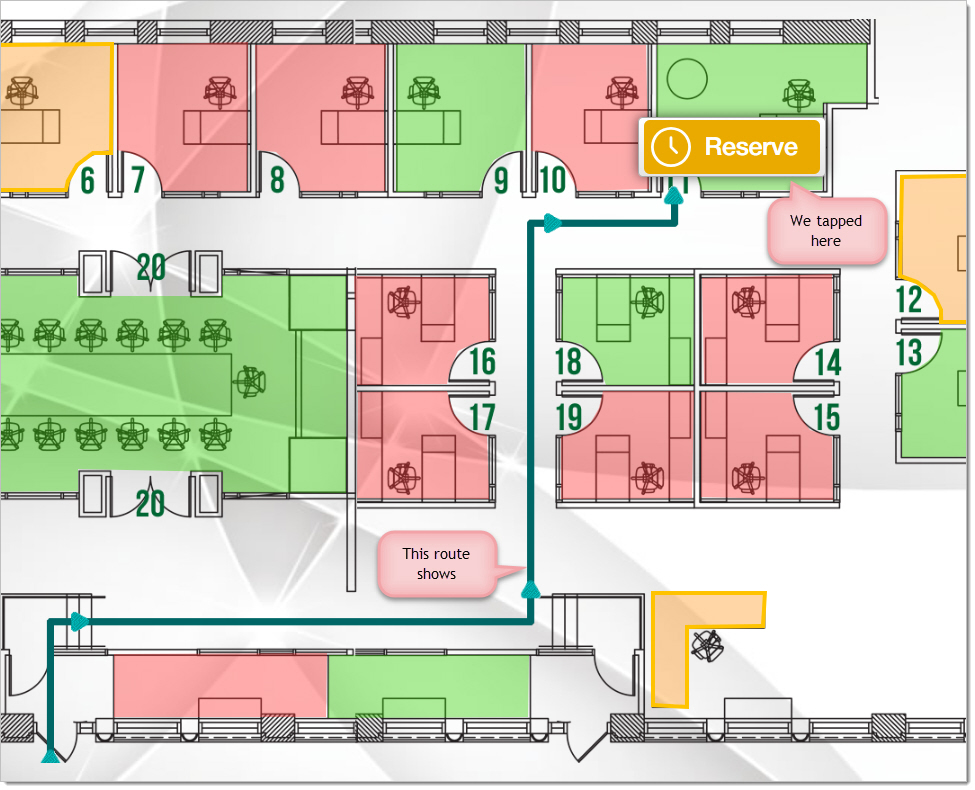
Lets first look at some example routes:
When we tap on the resource we see a green path with some arrow markers...
 Or we could use a blue route, when tapping on the Legend or the Agenda:
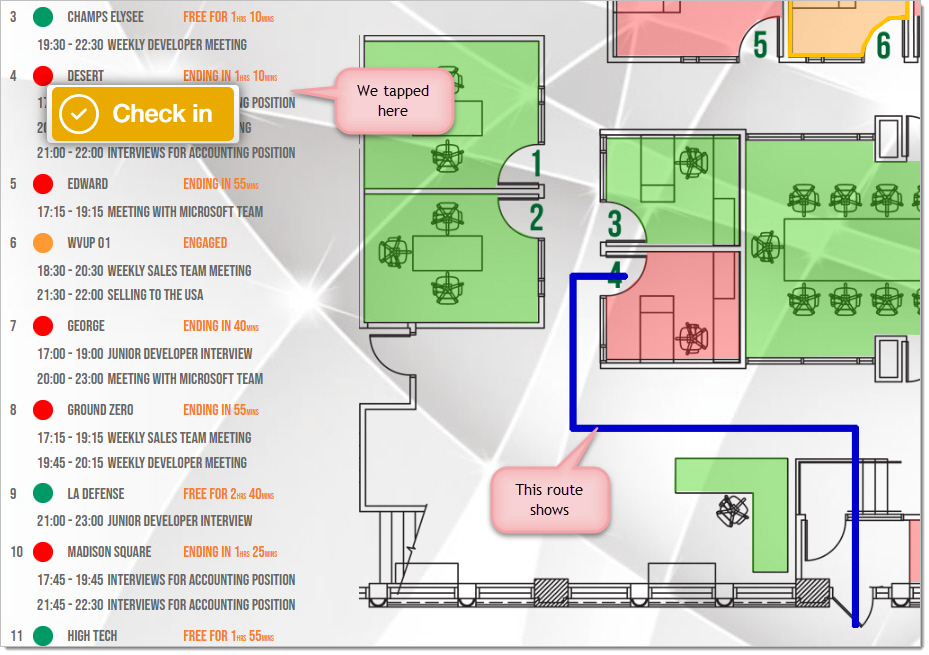 Note: the route will show for 20 seconds and then fade, unless another route is needed, which will make the first disappear right away.
How to create routes
To create a route you will need to use a graphics package that support layers.
Note: the route will show for 20 seconds and then fade, unless another route is needed, which will make the first disappear right away.
How to create routes
To create a route you will need to use a graphics package that support layers.
- Use your Floor plan graphics on a lower layer
- Draw your route on a new layer in any colour or design you wish
- Export the layer with the route as a "gif" ensuring the background is transparent
- Save the file using the name specified in the resource, and as shown in the Floor plan editor (see below)
- Upload the files to the Door Tablet server, to a folder you create under the root of your graphic assets. See more details below.
- Test your work
Using a graphics package
Many packages allow for the use of layers. In the example below we show using Adobe Fireworks, an old but popular package.
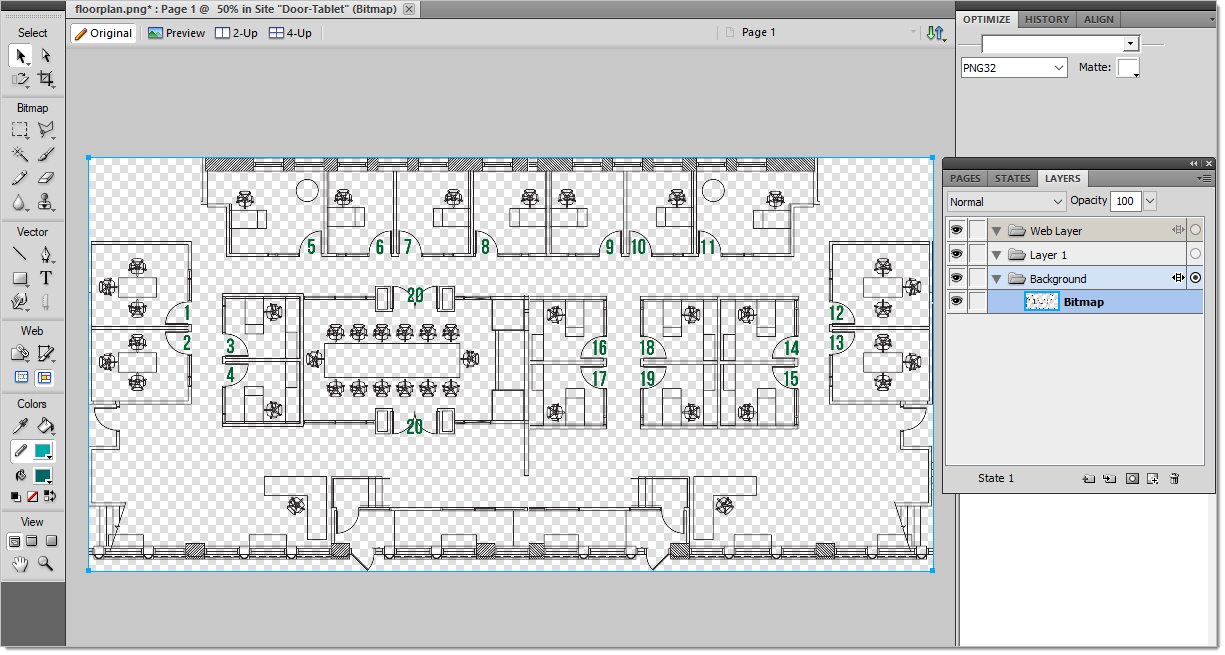
Open the Floor plan graphics:
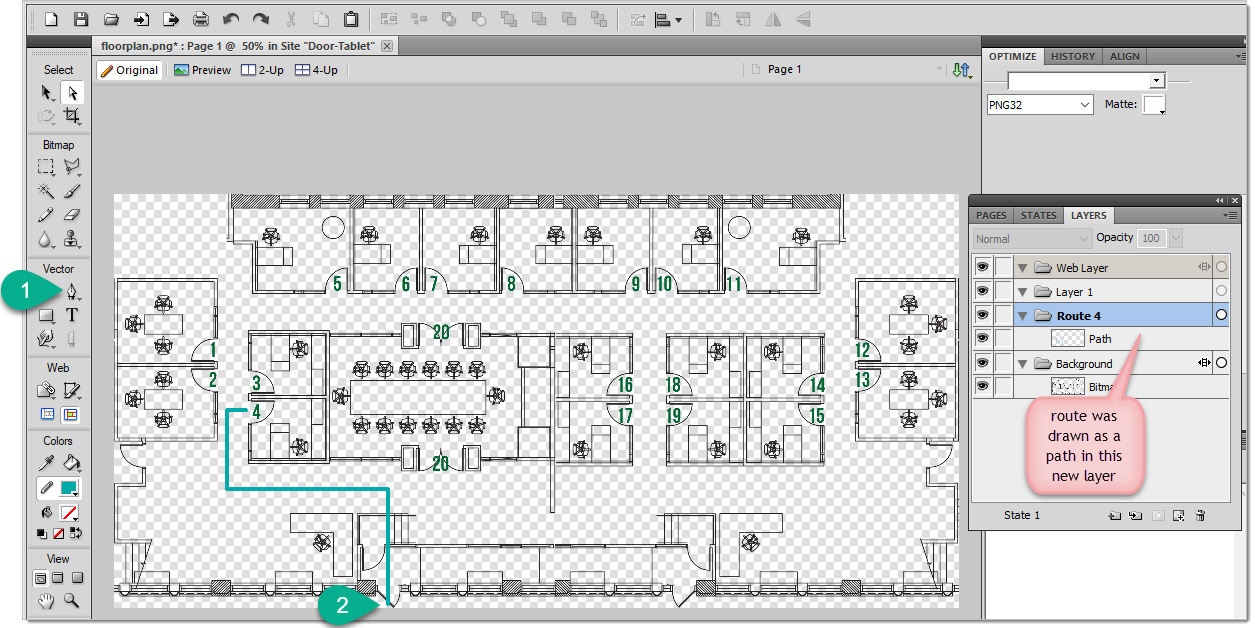
 Create a new layer and draw the route on it using the Pen Tool. In our tool we can use the shift key to ensure the lines are straight:
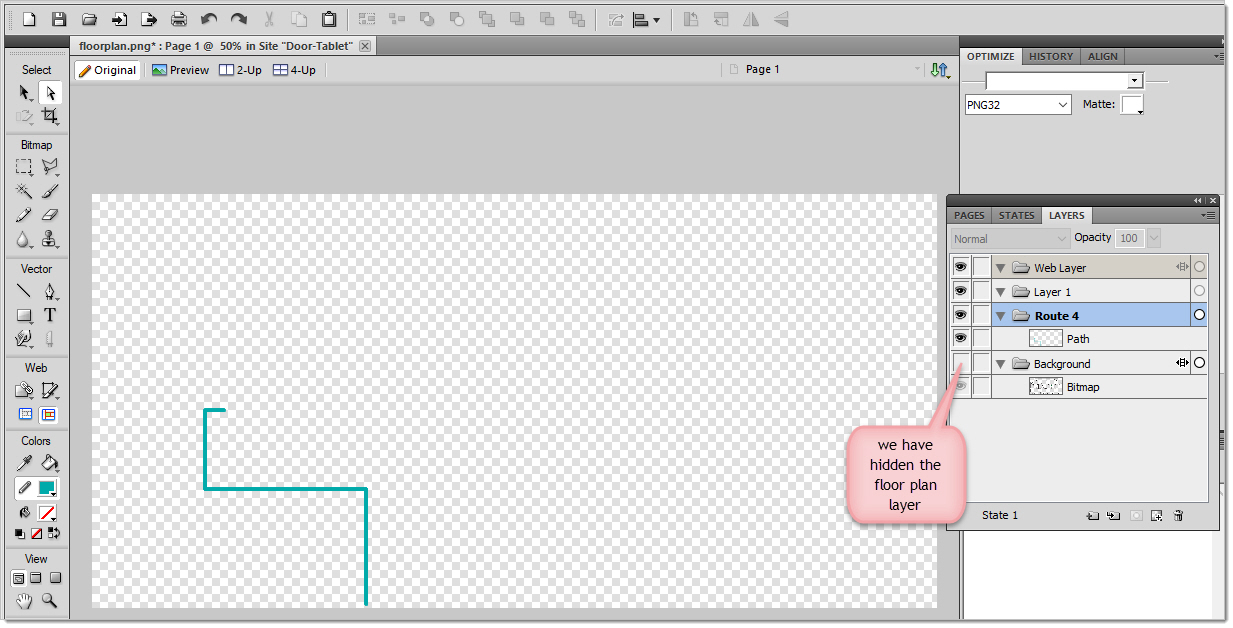
 You are now ready to hide the background and export the layer with the route. Select the gif file type and ensure the background is transparent.
 Save your route files
Use the Settings document to list the folder name:
Save your route files
Use the Settings document to list the folder name:
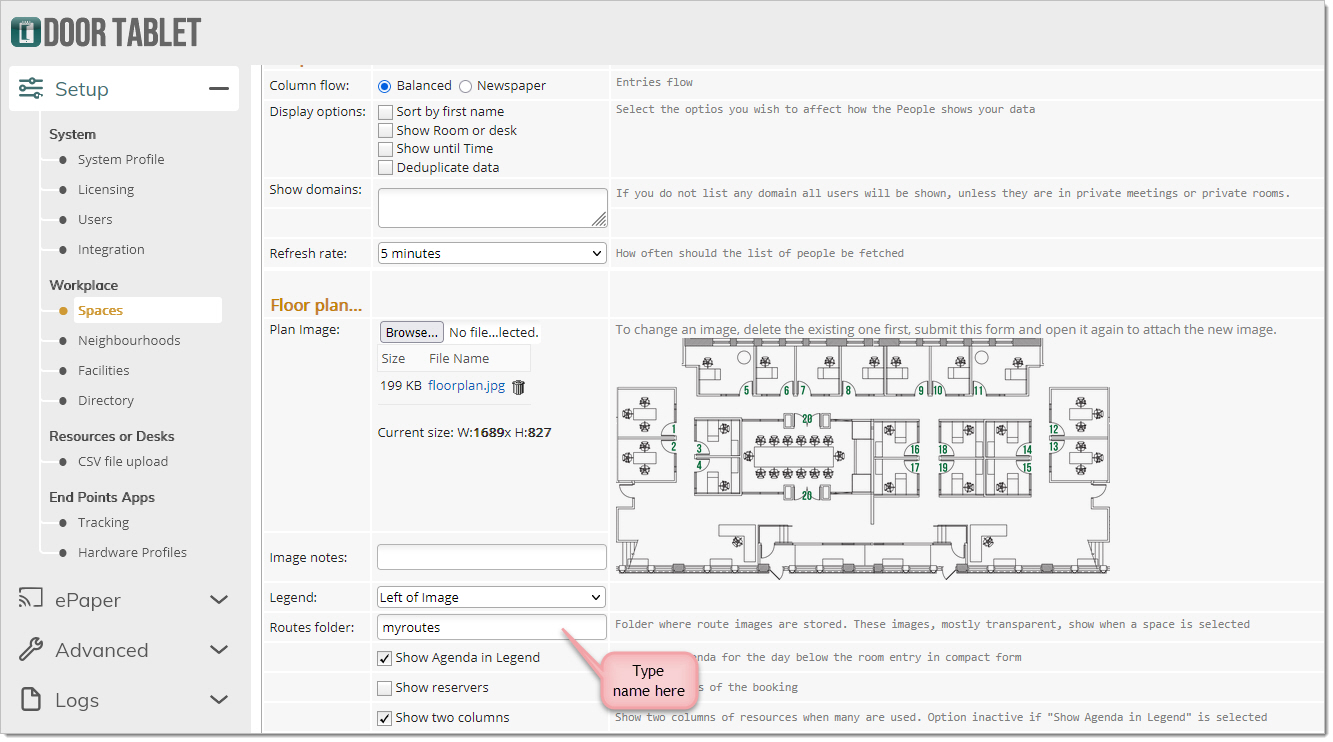 Note: typing a name above signals to the Floor plan that you have routes to display.
Where to place the folder
The folder will be placed on either the "doortablet" folder, for regular Door Tablet servers, or within your instance code if your are using Door Tablet CONNECT. So, using the example above, the folder holding the routes will be in <install-dir>/data/domino/html/doortablet/myroutes
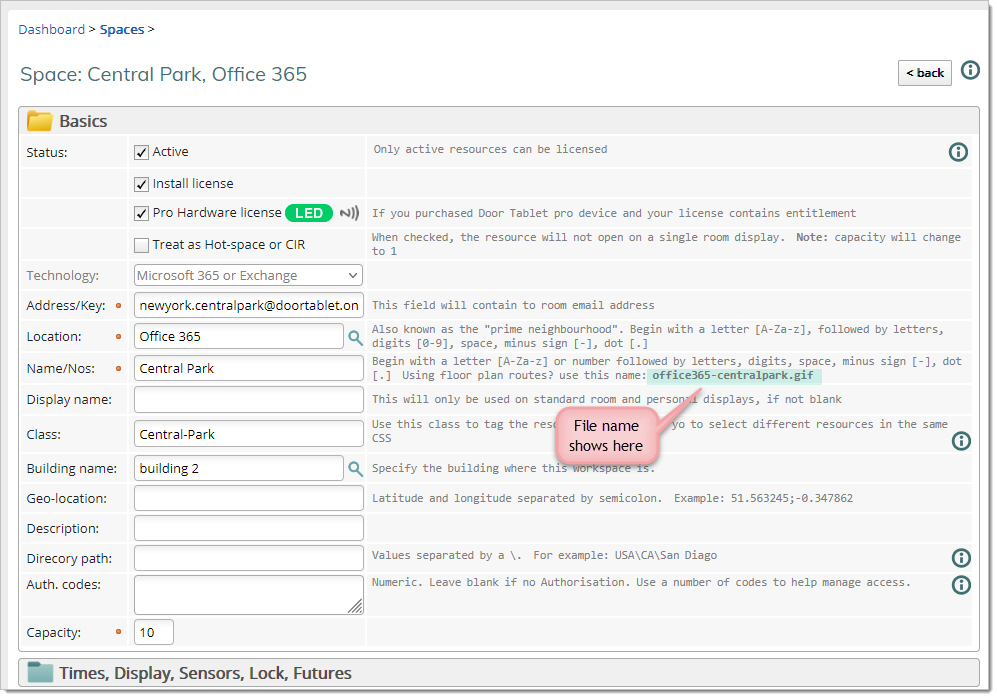
File names
Each one of your routes must be saved using a specific file name. To find what the file name is, open the room record...(see image below)
Note: typing a name above signals to the Floor plan that you have routes to display.
Where to place the folder
The folder will be placed on either the "doortablet" folder, for regular Door Tablet servers, or within your instance code if your are using Door Tablet CONNECT. So, using the example above, the folder holding the routes will be in <install-dir>/data/domino/html/doortablet/myroutes
File names
Each one of your routes must be saved using a specific file name. To find what the file name is, open the room record...(see image below)
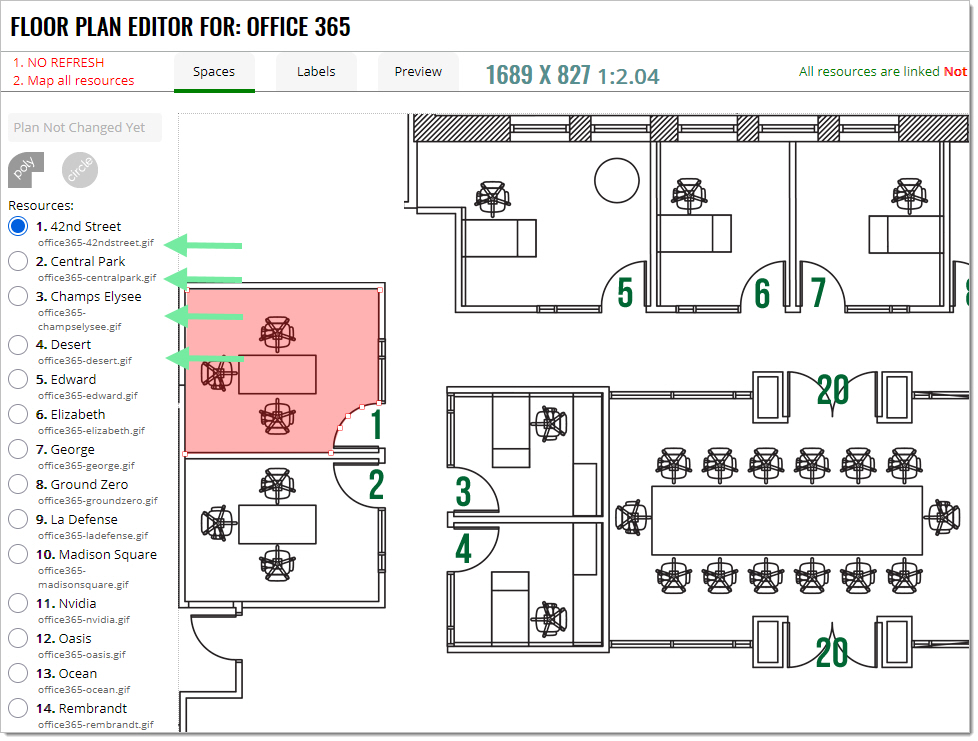
 Alternatively, you can see the file name for all resources in the neighbourhood by using the Floor plan editor:
 Once you have saved your gif files you are ready to test your work.