n
anonymousdoortablet/dthelp.nsfoffice-365-powershell
Protected content
| 248pages | Our help system contains many pages and videos for you to consume. This includes the complete information on how Door Tablet works, all its features and options, and of course the many benefits for your business. Door Tablet School offers many videos too. |
|
 |
| 
Click on images to see them in full screen
3663AC66B363034D802588E80043E66APowerShell Commands
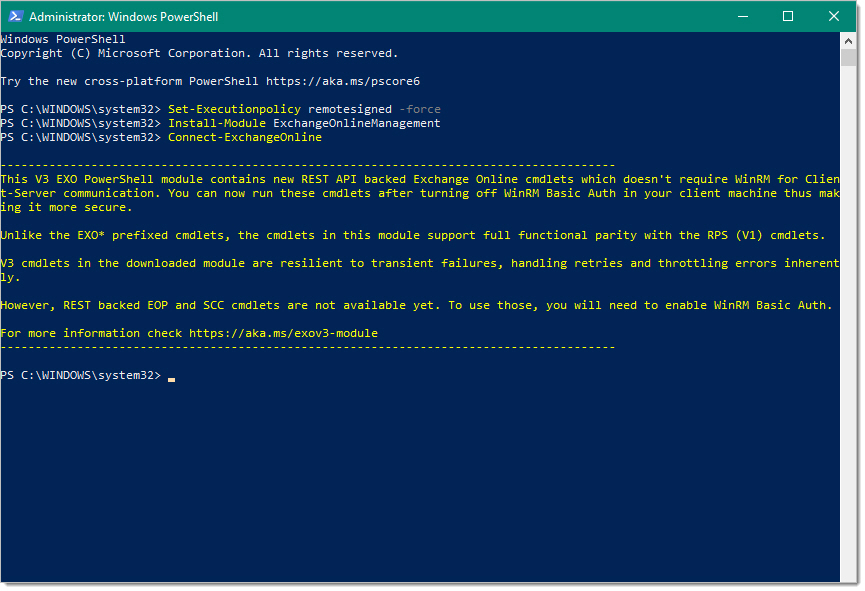
From October 2022 Access to Microsoft 365 using PowerShell has changed. This is due to the Deprecation of Basic Authentication.
This document shows the new protocol.
To connect and manage you Microsoft 365 instance, use the following commands in the order listed.
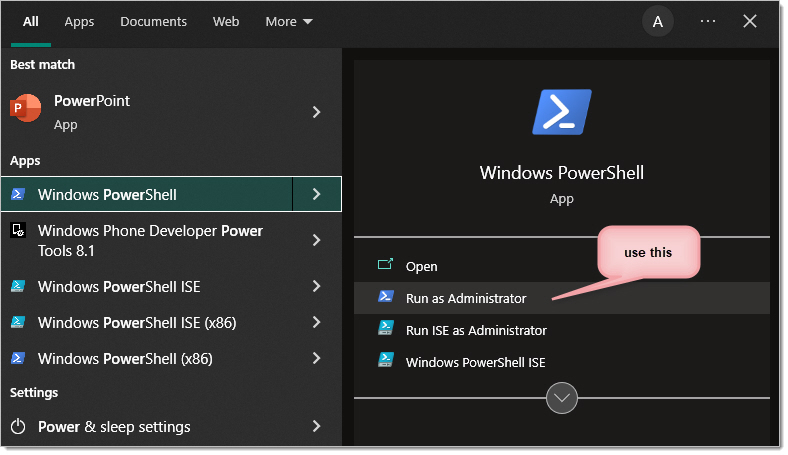
1. Run Windows PowerShell in Administrator mode
2. Set the execution policy for remote sessions
Set-Executionpolicy remotesigned -force
3. You will need to install a new module by issuing the following command. If you are prompted for further installation please follow
Install-Module ExchangeOnlineManagement
4. You are now ready to login. Use a Global Admin account if you wish to perform all the functions listed below
Connect-ExchangeOnline
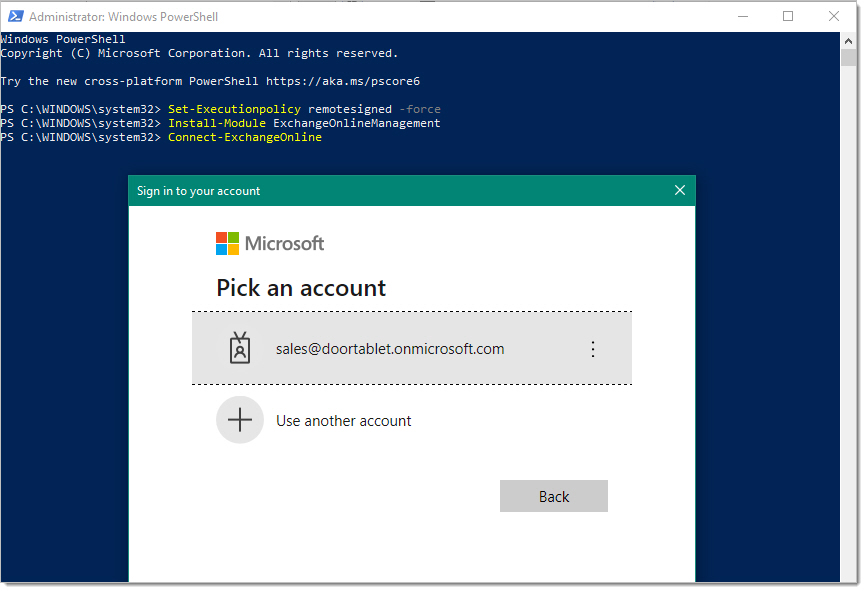
Click continue and type your password.
You may get this error:
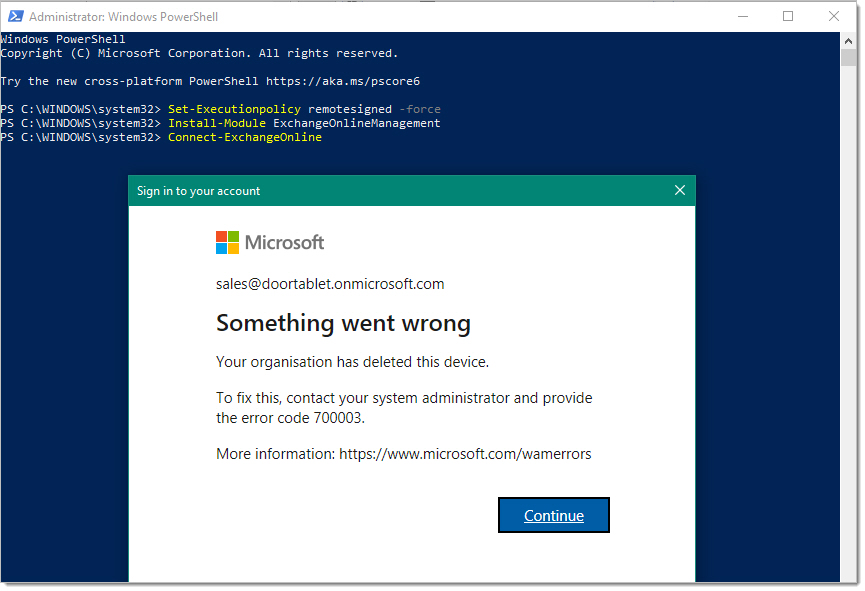
Once you continue you will be connected and ready, despite the warning:
5. Create a Distribution Group (of type "RoomList")
New-DistributionGroup -Name <name> -DisplayName "<display_name>" –PrimarySmtpAddress <group_smtp_address> –RoomList
For example...
New-DistributionGroup -Name DT_rooms1 -DisplayName "Door Tablet Rooms1" –PrimarySmtpAddress DT_rooms1@doortablet.onmicrosoft.com –RoomList
6. Check your work so far
List the group you have just created:
Get-DistributionGroup | Where {$_.RecipientTypeDetails -eq "RoomList"} | Format-Table DisplayName,Identity,PrimarySmtpAddress
By the way, to list your meeting spaces:
Get-Mailbox | Where-Object {$_.RecipientTypeDetails -eq "RoomMailbox"} | Format-Table DisplayName,Identity,PrimarySmtpAddress
7. Add a meeting space to the new group (there is a way to add a number of meeting spaces in one go)
Add-DistributionGroupMember –Identity <name> -Member <room_smtp_address>
For example:
Add-DistributionGroupMember –Identity DT_rooms1 -Member 42ndstreet@doortablet.onmicrosoft.com
8. Check your work
Get-DistributionGroupMember -Identity <name>
For example:
Get-DistributionGroupMember -Identity "DT_rooms"
Additional commands
In order to ensure that meeting subjects show on the display, use the following command (Exchange 2013 and Microsoft 365 only)
Set-CalendarProcessing -Identity <name> -DeleteSubject 0 -AddOrganizerToSubject 0
For example:
Set-CalendarProcessing -Identity 42ndstreet -DeleteSubject 0 -AddOrganizerToSubject 0
And
Set-CalendarProcessing -Identity <name>-AutomateProcessing:AutoAccept
For Example:
Set-CalendarProcessing -Identity 42ndstreet -AutomateProcessing:AutoAccept
If you need attachments to be copied to the room calendar, when using the Door Tablet image overlay feature, issue the following command:
Set-CalendarProcessing -Identity <name> -DeleteAttachments 0
For example:
Set-CalendarProcessing -Identity 42ndstreet -DeleteAttachments 0
Please note that you may combine the calls like so:
Set-CalendarProcessing -Identity <name> -DeleteSubject 0 -AddOrganizerToSubject 0 -DeleteAttachments 0
To perform the same task on all your meeting spaces, perform the following commands:
Get-Mailbox | Where {$_.ResourceType -eq "Room"} | Set-CalendarProcessing -DeleteSubject 0 -AddOrganizerToSubject 0 -DeleteAttachments 0
and
Get-Mailbox | Where {$_.ResourceType -eq "Room"} | Set-CalendarProcessing -AutomateProcessing:AutoAccept
Setting Folder rights
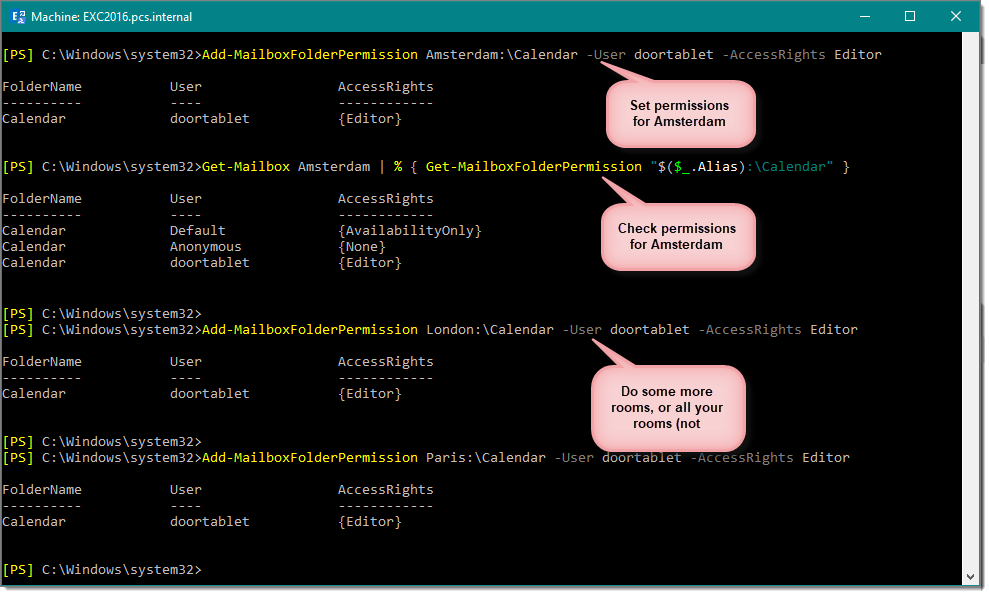
If you wish to use Folder rights and avoid Impersonation, grant the service account Editor rights to the resource calendars, as follows:
Add-MailboxFolderPermission <room-alias>:\Calendar -User <service-account-name> -AccessRights Editor
For example:
Add-MailboxFolderPermission Amsterdam:\Calendar -User doortablet -AccessRights Editor
Verify your work
Get-Mailbox Amsterdam | % {Get-MailboxFolderPermission "$($_.Alias):\Calendar"}
Removing a permission
In case you made a mistake and just wishes to remove the assignment of rights to a calendar folder, use the following command:
Remove-MailboxFolderPermission <room-alias>:\Calendar -User <service-account-name>
For example:
Remove-MailboxFolderPermission Vermeer:\Calendar -User doortablet