n
anonymousdoortablet/dthelp.nsfhot-desk-booking
Protected content
| 273pages | Our help system contains many pages and videos for you to consume. This includes the complete information on how Door Tablet works, all its features and options, and of course the many benefits for your business. Door Tablet School offers many videos too. |
|
 |
| 
Click on images to see them in full screen
182EA6439F5369F980258DB50055725CBooking
How to Book a Desk with Door Tablet BOOKER
Door Tablet BOOKER provides several ways to book a desk, depending on how your system is configured. You can book either:
- Using the time bars (ideal for hourly bookings)
- Using the floor plan (ideal for half-day or full-day bookings)
Configure time slots and other options
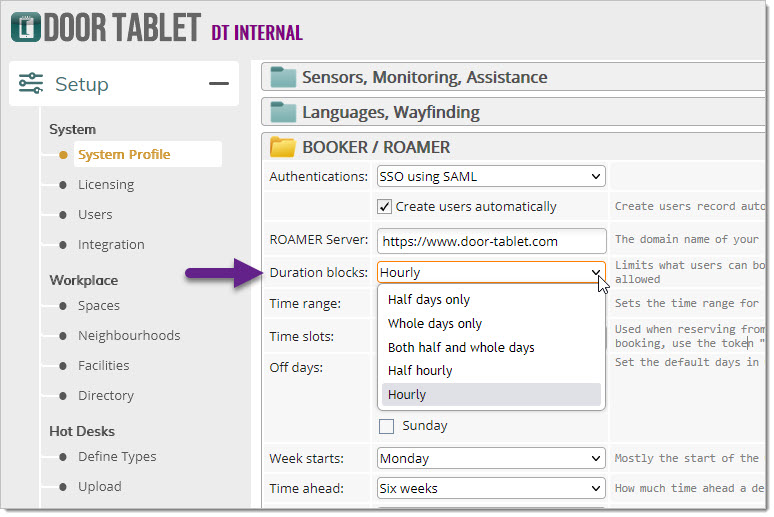 1. Booking Desks Using Time Bars
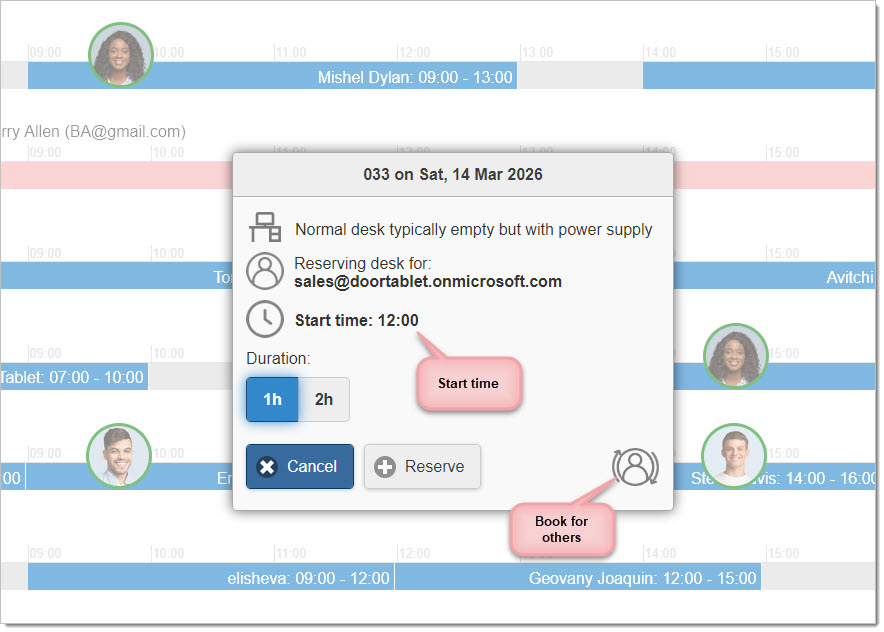
If your system is set up for hourly bookings, you must use the time bars:
- Locate an empty time slot on the time bar.
- Click once on the slot. A booking pop-up will appear.
- By default, the system assumes you are booking for yourself.
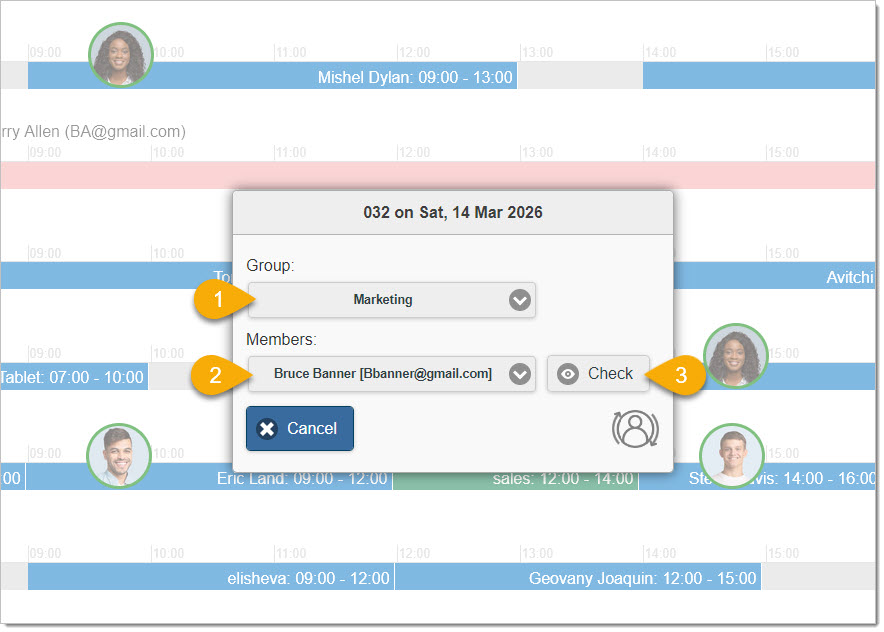
- Booking for someone else:
- Click the silhouette icon with two arrows at the bottom right of the pop-up.
- Select the person you want to book for.
- If your system uses categories or teams, you will see a list of your teams and their members. Selecting a person from this list is easier than typing their name manually.
- If you are booking for someone outside of your teams, start typing their name or email. A green tick will appear when a unique match is found.
- Check availability:
- Click Check to verify that the person is available at that time.
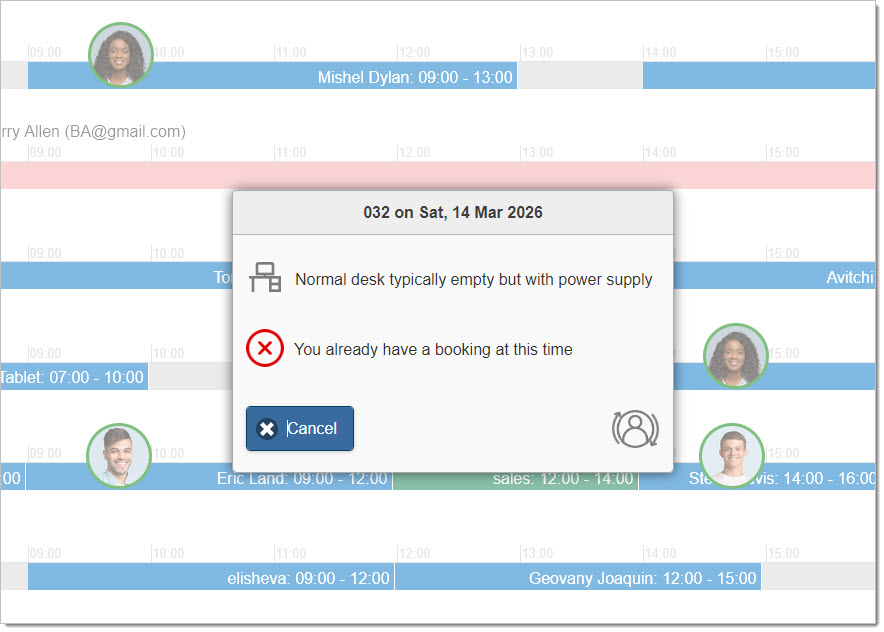
- Note: A person may be unavailable if they are already booked, even in another area.
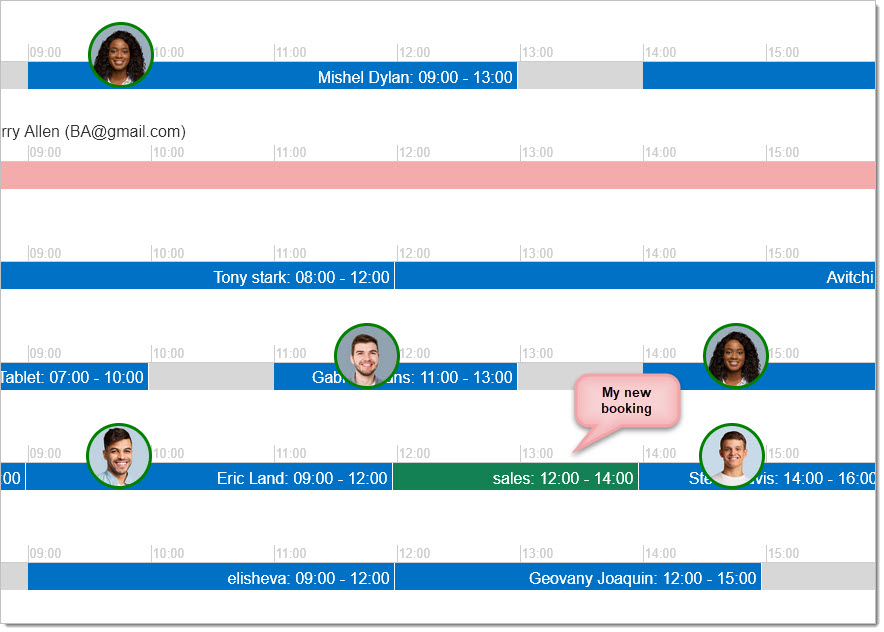
Booking created...
When your system is set for day bookings:
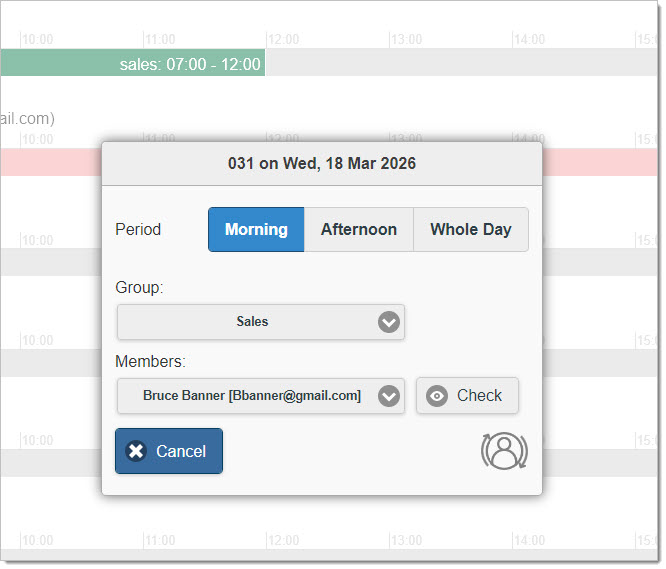
2. Booking Desks Using Floor Plans
If your system supports half-day or full-day bookings, you can also book directly from the floor plan:
- Navigate to the floor plan view.
- Click on an available desk to open the booking pop-up.
- Follow the same steps as in the time bars booking for yourself or others.
Important: If your system only allows hourly bookings, attempting to book from the floor plan will display a message directing you to use the time bars.
3. Understanding Categories and Teams
- Categories are predefined groups of users (e.g., teams or departments).
- By default, your categories or teams appear in the drop-down list when booking for someone else.
- Booking through categories is easier because you don’t need to type the individual’s name or email.
- You must be a member of a category to book within it.
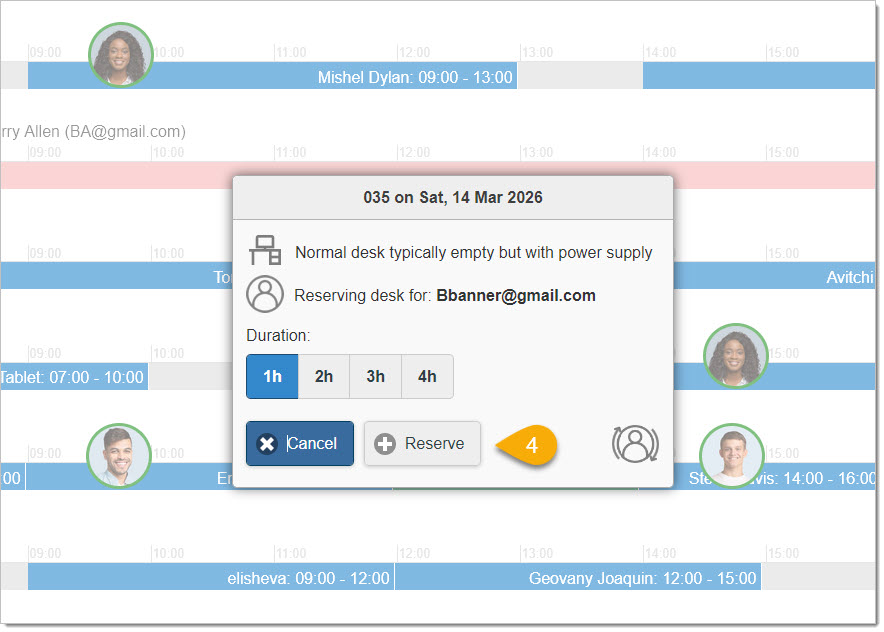
After clicking Check:
If all is OK, you can now reserve the desk...
4. Booking Confirmation
Once a booking is made:
- The booking appears immediately on the time bars.
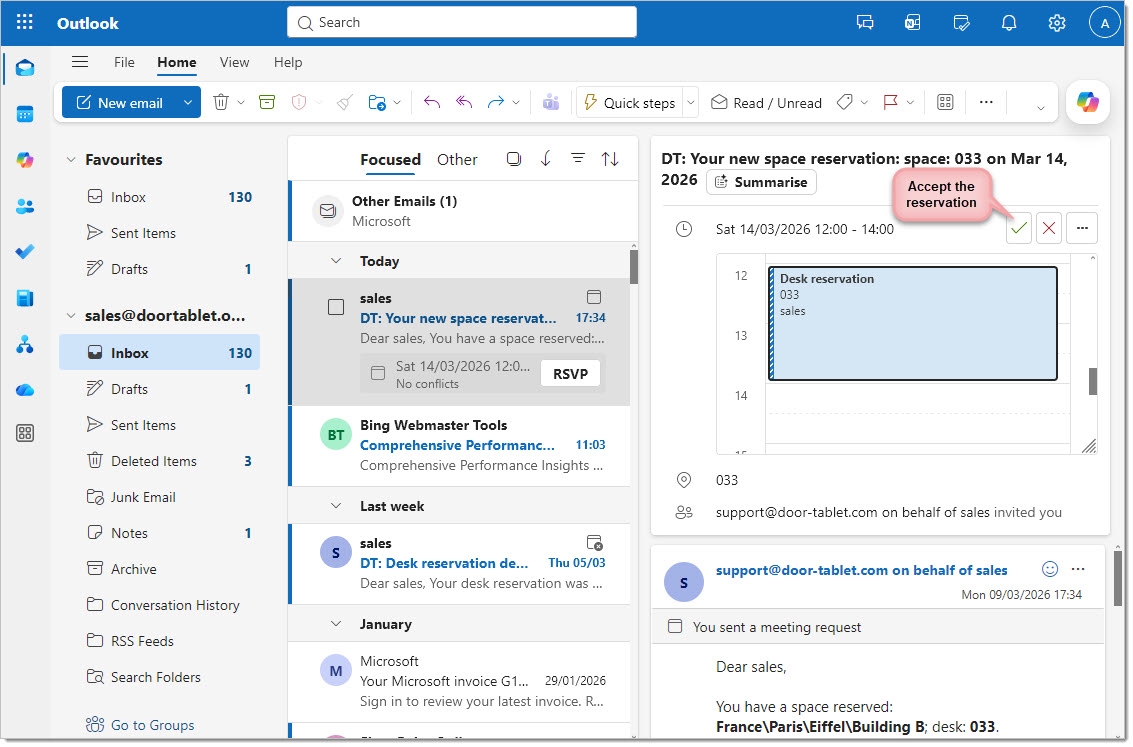
- A confirmation email is sent to your mailbox.
- This email is actually a calendar invitation.
- Accepting it adds the booking to your calendar and serves as a reminder.
 5. Changing or Cancelling a Booking
If you need to cancel or modify a booking:
- Go to BOOKER and remove the booking.
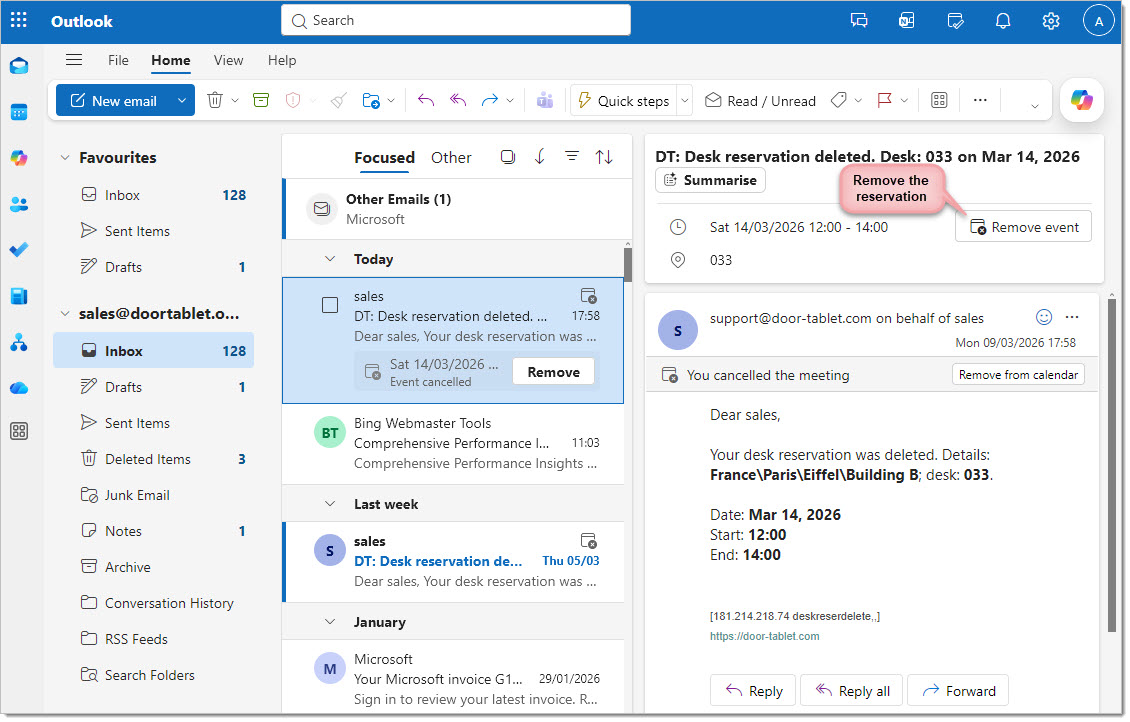
- A cancellation email is sent to your mailbox.
- The cancellation works like a standard calendar event:
- If you accept the cancellation, your calendar entry is removed.
- If you do not accept, the booking may still appear in your calendar but will be marked as canceled.
Currently, calendar synchronisation has been tested with Microsoft 365, but it should also work with Google Workspace and other platforms that support standard calendar protocols.
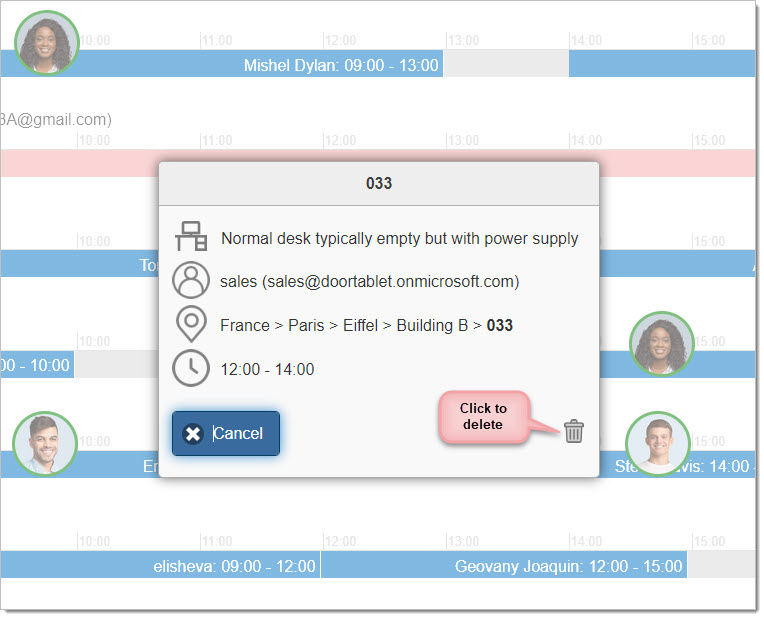
Once you OK the deletion, an email is sent to you, which will remove the booking from you Calendar.
 Note:
Note: calendar activities are also shown in Microsoft Teams
Tips and Best Practices
- Always check availability before booking for someone else.
- Accepting the calendar invitation ensures the booking appears correctly in your diary.
- If you book using categories or teams, you avoid manual typing errors.
- Bookings outside your assigned categories may require additional permissions.
This version makes the workflow
step-by-step, groups information logically, and uses
clear headings to make the document easier to scan.
VIDEO: Door Tablet BOOKER for admins